
Hawaiki Super Glow - Manual

Getting Started
Hawaiki Super Glow is very sophisticated with loads of features to explore, but if you're just wanting to get started right away here are some basic tips.
To make basic adjustments to spread of glow we recommend you use the Glows slider rather than the Radius slider. There are six glow components linked together exponentially - the Radius adjusts the exponent, but the Glows sliders selects how many glows are being used. A tighter glow that is less spread out is best achieved by reducing the number of glow elements with the glow slider.
To adjust the intensity of the glow try adjusting the Gain slider which you can find at the top of the Color section. As you get more familiar with Super Glow you'll discover that there are a few different options that you can work with, but Gain is a good starting point. For example, if you are after a look that it more "fogged" try increasing the Brightness value.
To adjust the basic color of the glow, a good place to start is with the RGB Gain controls.
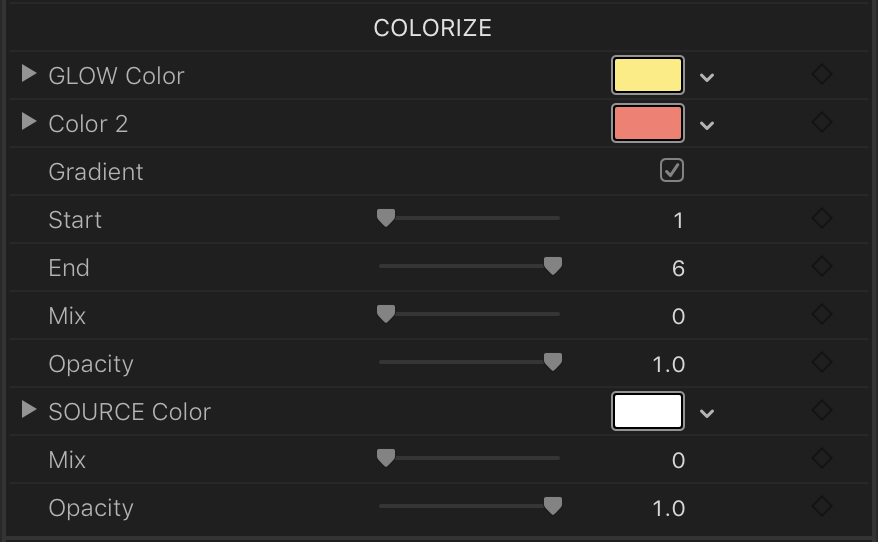
If you want to get a bit more fancy, reset the RGB Gain (to keep things simple), and go down to the Colorize section and increase the value of the Mix slider all the way up to the top. The glow will now be colorised using a gradient that interpolates between the two color swatch values. Glow Color sets the core color of the glow and Color 2 sets the outer value. If you increase the Start value, the core color will expand outwards, and conversely adjusting the End value brings the outer color closer to the centre.
If you are working with images that have alpha information, the alpha of the foreground will determine the area that is being glowed and as a starting point this will usually be enough. However if you're working with images with no alpha information, you will want to limit the area that is being glowed, for example if you only want to glow a bright light, or a window, or a light sabre. Super Glow offers some really cool ways of isolating those areas (including the option to use a HSV keyer), but to get you started we recommend you use the Threshold control. Increasing the threshold value means that only the very brightest areas will be glowed. The Softness control will adjust how sharp or soft the transition to those areas will be.
So that's a quick look at the basic operation so you can get up and running quickly. The really interesting part comes when you start diving into some of the many advanced features. But even if you never touch these, Super Glow is going to give you amazing-looking, rich, photorealistic glows, whether they're really subtle or blindingly intense.
Have fun!
New in Super Glow 1.1 - support for DaVinci Resolve 20.
Operation
- How to Apply - Hawaiki Super Glow can be found in the Final Cut Pro Effects Browser, the Effects and Preset panel and Effect menu in After Effects, in Premiere Pro within the Effects Panel - Video effects, and in the Motion Library tab under Filters. Simply drag it onto your clip to get started.
- Bounding Box - the bounding box for the glow is determined by the bounding box of the source layer and if that’s smaller than your overall project dimensions it will lead to the glow being cropped to the bounding box. To get around that all you need to do is to reformat the layer to make it the same as the project dimensions. In After Effects you can do that by precomposing, in Premiere by nesting, in Final Cut Pro by creating a compound clip, and in Motion by creating a Fixed Resolution group. When Super Glow is applied to the precomp, the nest, the compound clip or the group the glow will now fill the frame.
System Requirements
-
macOS: macOS 14.7 Sonoma +, macOS 15 Sequoia +, macOS 26 Tahoe
FxFactory: 8.0.27 +
Apps: DaVinci Resolve 20 +, Final Cut Pro 10.6 +, Motion 5.6 +, Premiere Pro 22 +, After Effects 22 +
Core Controls
- VIEW Menu
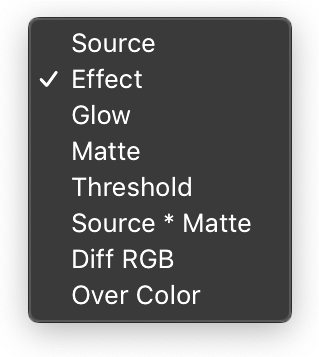
- Source - Shows the untreated original source image.
- Effect - Shows the final composite of the glow and the source.
- Glow - View the glow only.
- Matte - The Matte view reflects changes made in the Matte group showing the alpha channel of the source clip that is fed into the glow routine (prior to thresholding. lt also defines the pixels that are comped over the effect when "Source over Effect" (in the Compositing group) is enabled and the pixels that are removed (the inverse of the matte) when "Remove Background" is checked.
- Threshold - Shows input the areas of the image to which the glow is applied i.e the source image after any matte and threshold operations.
- Source * Matte - The source image multiplied by the matte. Shows the area of the source used with Remove Background and Source over Effect.
- Diff RGB - Returns the absolute difference between the RGB channels (alpha is set at 1) of the effect and the source. Used with certain blend modes, such as Normal, it can create a cut-out effect.
- Over Color - Composite the effect over a solid color. Set with the Over Color swatch at the bottom of the inspector.
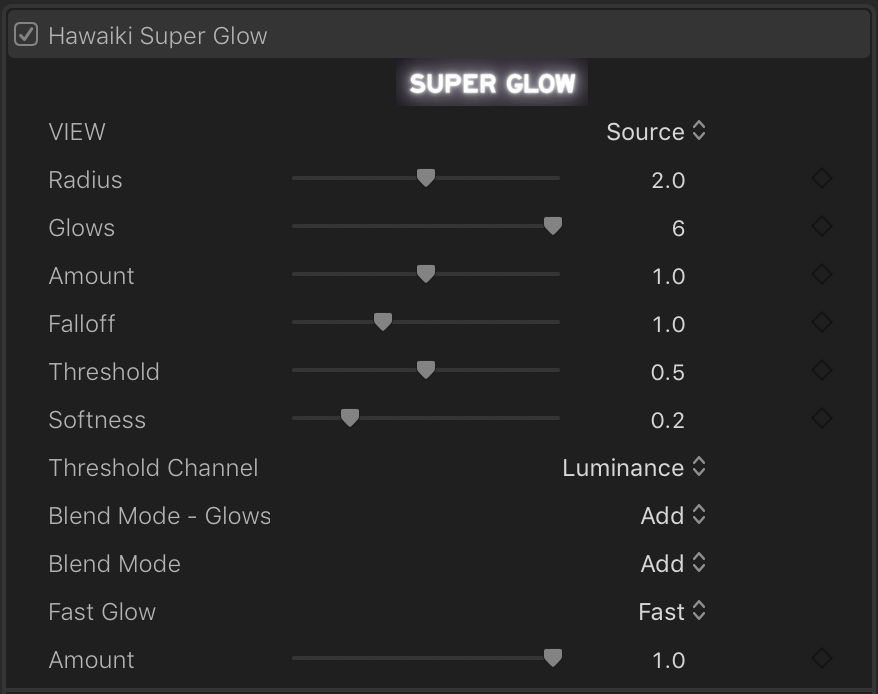
- Radius - Set the overall radius of the glow.
- Glows - Set the number of Glows. Glow 1 is the glow with the smallest radius, Glow 6 the largest. Decreasing the number of glows will reduce the apparent Radius.
- Falloff - Expand and soften or contract and harden the edge of the glow
- Threshold - Set the value above which the Glow will be applied.
- Softness - Softens the edge of the threshold.
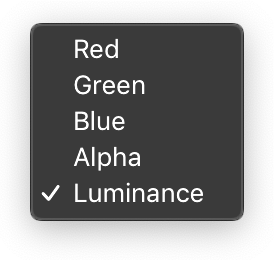
- Threshold Channel - Select from Luminance, Red, Green,Blue or Alpha.
- Amount - Control the overall amount of glow. A value of zero will show the original image.
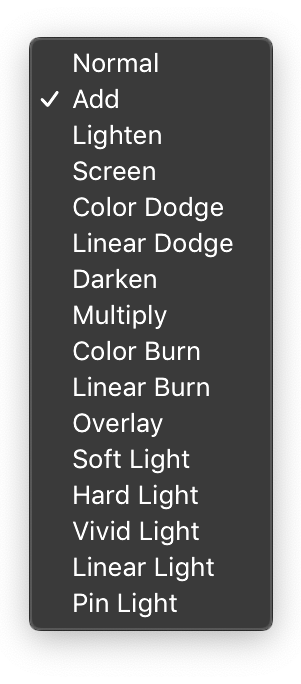
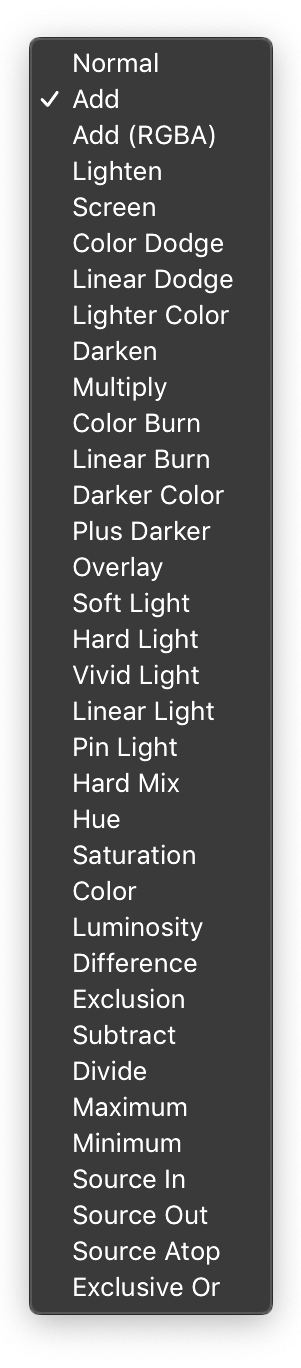
- Blend Mode - Glows - Set the blend mode that is used to combine the six glows.
- Blend Mode - Set the blend mode that is used to combine the glows with the source image.
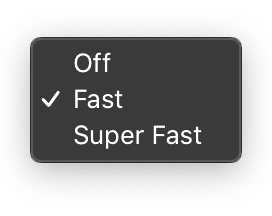
- Fast Glow - Fast works well 90 percent of the time. Super Fast is good to speed up previewing - you can then switch back to Fast for rendering. Only switch to Off if you have a fast computer and can see a visual difference.
- Amount Decreasing the Fast Glow amount may improve quality at the expense of preview and render speed.
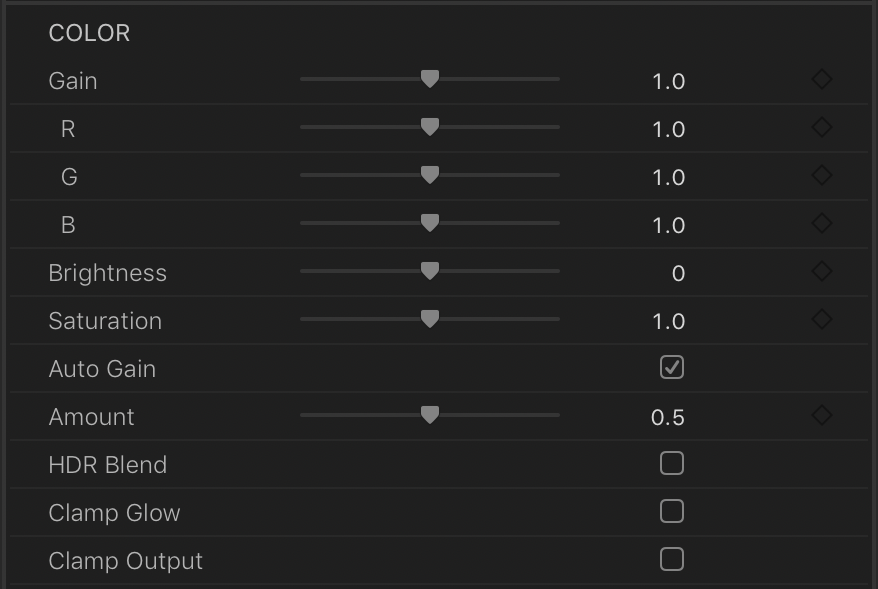
Color
- Gain- Adjust the overall Gain of the Glow.
- R - Adjust the gain of the Red channel.
- G - Adjust the gain of the Green channel.
- B - Adjust the gain of the Blue channel.
- Brightness - Adjust the brightness of the glow with an offset control - the slider value is added to the RGB channels.
- Saturation - Adjust the saturation of the glow.
- Auto Gain - Automatically increases the gain when the radius is increased so as to maintain intensity.
- Amount - Adjust the amount of Auto Gain.
- HDR Blend - Enable to prevent clamping in some Blend modes.
NB. not all blend modes clamp by default and not all blend modes can work in HDR. - Clamp Glow - Clamp the RGB channels of the Glow at 0 and 1 prior to final compositing with the source.
- Clamp Output - Clamp the RGB channels of the output - Effect in the View menu).
Colorize
- GLOW Color - Change the color of the glow. When Gradient is enabled it sets the Start color.
- Color 2 - Set the End Color of the Gradient.
- Gradient - Enable the gradient color fill.
- Start - Set the glow (1 to 6) where the GLOW color starts e.g if set to 2 Glow 1 and 2 will be set to the GLOW color.
- End - Set the glow (1 to 6) where the Color 2 ends e.g if set to 5 Glow 5 & 6 will use Color 2.
- Mix - Adjust the mix of the original source color with the new color shown in the GLOW Color and Color 2 swatches.
- Opacity - Adjust the opacity of the glow.
- SOURCE Color Change the Color the source image that is composited with the glow.
NB. It does not change the color of the input to the glow process. - Mix - Adjust the mix of the original color with the new color defined in the SOURCE Color swatch.
- Opacity - Adjust the opacity of the source image that is composited with the glow.
NB. It does not change the opacity of the input to the glow process.
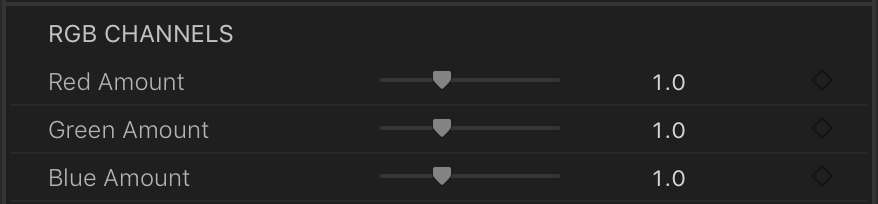
RGB Channels
- Red Amount - Adjust the mix of the source and the glow effect for the Red Channel.
- Green Amount - Adjust the mix of the source and the glow effect for the Green Channel.
- Blue Amount - Adjust the mix of the source and the glow effect for the Blue Channel.
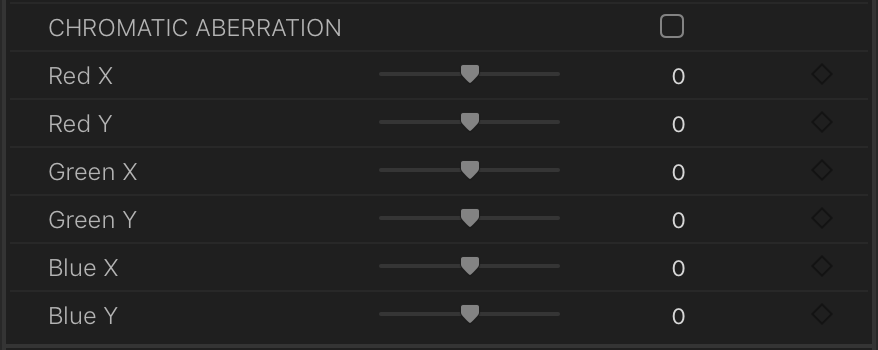
Chromatic Aberration
- CHROMATIC ABERRATION - Check to enable Chromatic Abberration.
- Red X - Offset the Red channel of the glow horizontally.
- Red Y - Offset the Red channel of the glow vertically.
- Green X - Offset the Green channel of the glow horizontally
- Green Y - Offset the Green channel of the glow vertically.
- Blue X - Offset the Blue channel of the glow horizontally.
- Blue Y - Offset the Blue channel of the glow vertically.
Glows
- Controls for each individual Glow: 1 to 6
- Radius - Set the radius for the glow - scales the value set with the Radius slider at the top of the inspector.
- Gain - Change the gain of the glow.
- Color - Set the Color of the glow.
- Mix - Adjust the mix of the global color (set in the Color group) and the individual glow color swatch.
- Opacity - Change the opacity of the glow.

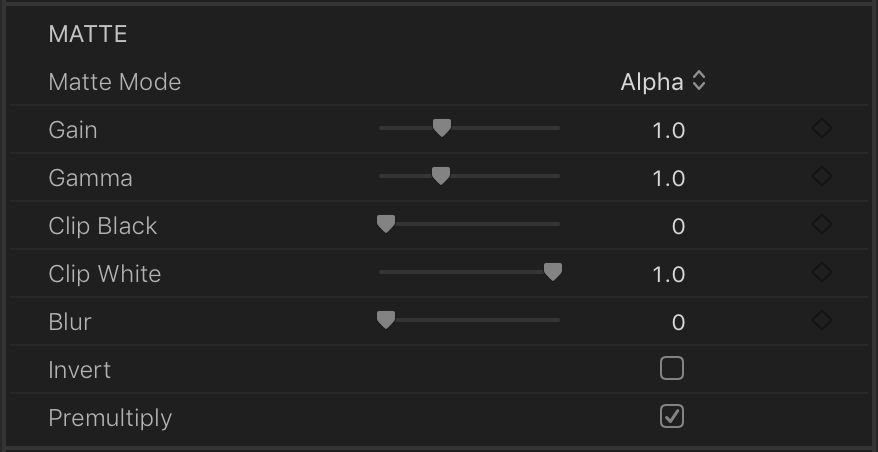
Matte
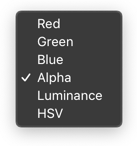
- Matte Mode - Choose the method used to generate the matte that is used to set the alpha of the input image of the glow operation. (It also defines the image used in Remove Background and Source over Effect - see below) NB. The Threshold controls further refine the input selection.
Choose between the Red, Green, Blue and Alpha channels, Luminance, or utilize the built-in HSV keyer.
- Gain - Adjust the matte gain.
- Gamma - Adjust the matte gamma.
- Clip Black - Set the black point of the matte.
- Clip White - Set the white point of the matte.
- Invert - Invert the matte.
- Premultiply - Controls whether the matte is multiplied by the source alpha (when you use a channel other than alpha to define the matte).
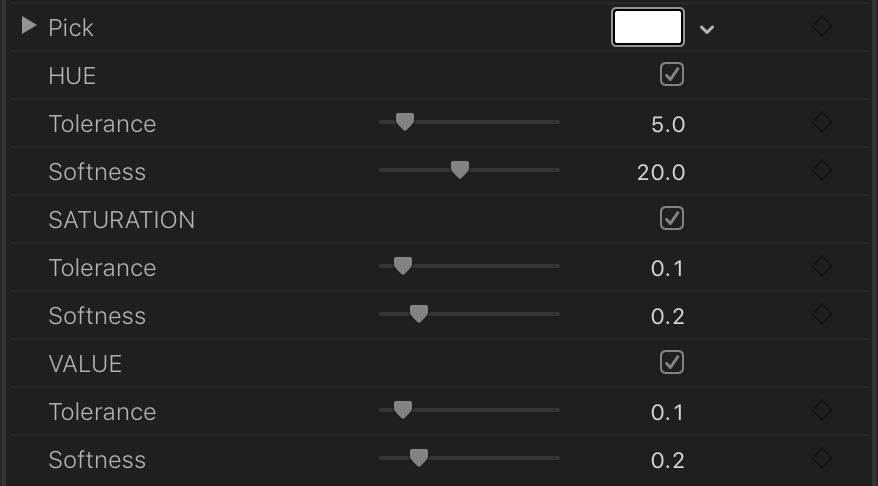
HSV Keyer
- Pick - Use the color picker to pick the color onscreen that you want to key.
- HUE - Enable the Hue checkbox to compare the Hue of the pick and the source image pixels.
- Tolerance - Adjust the hue range included in the key.
- Softness - Adjust the falloff from the edge of the range to hues outside the range. Increasing softness will include more hue values at the edge of the range.
- SATURATION - Enable the Saturation checkbox to compare the saturation of the pick color and the source image.
- Tolerance - Adjust the saturation range included in the key.
- Softness - Adjust the falloff from the edge of the range to saturation outside the range. Increasing softness will include more values at the edge of the range.
- VALUE - Enable the Value checkbox to compare the Value of the pick color and the source image.
- Tolerance - Adjust the Value range included in the key.
- Softness - Adjust the falloff from the edge of the range to values outside the range. Increasing softness will include more values at the edge of the range.
Compositing
- Remove Background - Remove Background applies the matte used for the glow to the source i.e the matte defines the alpha channel of the source clip and you can see the result of this in the Source * Matte view. You can then choose to comp this over the original source using Over Background or do it yourself within the host. Essentially provides you with a built-in keyer and gives you a different look with some blend modes.
- Source Over Effect - Comps the source over the final composite - useful for adding back detail. As with Remove Background the matte defines the source alpha.
- Over Background Comps the final composite back over the source - so you can remove the background, apply a glow to a part of an image (defined in the matte group) then comp that back over the original image.
- Falloff Solid BG - Enable this so the Falloff slider works as expected when you have a clip with a uniform alpha of 1 (that you haven't changed in the Matte group).
- Clamp Glow Alpha - Restrict the Alpha channel of the glow within the range of 0 to 1. Some blend modes may cause the alpha to go outside this range.
- Clamp Output Alpha - Clamp the Alpha channel of the combined source and glow to 0 to 1.
- Max Radius - Set the maximum radius, in pixels, for all six glows.

Over Color
- Choose the Color to composite over when the View menu is set to Over Color.

