Hawaiki Keyer 5 (Blue)

The industry’s most sophisticated Blue Screen Keyer now with AI tracking

What’s New

Keying Technique

System Requirements

macOS: macOS 11.5.1 Big Sur +, macOS 12 Monterey +, macOS 13 Ventura +, macOS 14 Sonoma +

FxFactory: 8.0.3 +

Apps: Final Cut Pro 10.6 +, Motion 5.6 +, Premiere Pro 14 +, After Effects 17 +

Tutorials

New in Hawaiki Keyer 5

Intro

Primary and Secondary - Basics

Screen Clean

Compatibility

Hawaiki Keyer 5 (Blue) is compatible with Final Cut Pro, Motion, Premiere Pro and After Effects.

Parameters

Matte

Off by default.

QUICK VIEW: The three quick view buttons allow you to access the most common views (Matte, Analysis and Source) at the flick of a switch. Note that the Matte button over-rides Analysis which in turn over-rides Source. All three can be enabled at once.


Analysis

Off by default.

Source

Off by default.

VIEW

VIEW Menu

Hawaiki Keyer provides a comprehensive set of view modes to make it easy to set up your key and refine the spill suppression. In Final Cut Pro and Motion (but not the Adobe hosts) there are onscreen buttons and menus for selecting the views which are duplicates of the Inspector controls.

View Menu

View Menu

The following options are available:

Invert

Off by default.

The Invert button allows you to invert many of the views, including: On Color, Final Key, Analysis, Main Matte, and Combined Matte.

Matte Check

Off by default.

Provides a gamma correction to the matte view so you can easily spot pixels in the background that are not clear. Leave off to have the Matte view match the alpha channel view of the host.

CROP

Quickly create a garbage matte and speed up rendering with complex keys. Crop doesn’t apply a matte at the end of the chain it defines the pixels that are processed from the beginning of the chain, for both image and matte operations.

New in HK5


Enable

Off by default.

Enable the Crop operation

Left

Set to 0 by default.

The slider is limited to values between 0 and 1 but you can type values between 0 and 0 by clicking on the current value in the inspector.

Right

Set to 1 by default. Only values between 0 and 1 are allowed.

Bottom

Set to 0 by default.

The slider is limited to values between 0 and 1 but you can type values between 0 and 0 by clicking on the current value in the inspector.

Top

Set to 1 by default. Only values between 0 and 1 are allowed.

Crop Key Automation

On by default.

Limits the automatic screen extraction (used when Auto is enabled in the Primary and Secondary keyers) to the area defined by the crop.

If you apply crop after you’ve finessed your key you may wish to disable this as the key may change, depending on how uniform your screen is. Normally the matte will soften when Crop Key Automation is enabled as the dark edges of the screen are excluded.

Crop Background

On by default.

Crop the image/clip that is used in the Background drop zone/ image well. The Crop is applied prior to any operations in which the Background is used.

Crop External Matte

On by default.

Crop the image that is used in the External Matte drop zone/ image well. The Crop is applied prior to any operations in which the External Matte is used.

DENOISE

The Denoise group gives the user a sophisticated method for reducing edge noise in the matte. It can also help to clear up stray backing pixels caused by noisy source footage. This option is always the preferred method for dealing with "jaggies" or steppiness on the edges of the matte. Unlike a conventional matte blur, Hawaiki Keyer's denoise does a much smoother job of cleaning the edges, while retaining as much of the detail as possible.


Enable

Off by default.

Enable the Denoise checkbox and adjust the Amount as required - try to use only as much as is needed to resolve your edge problem. You have the option to choose either Low, Medium or High denoise.

Strength

The following options are available:

Amount

Set to 1 by default. Only values between 0 and 1 are allowed.

Type

By default, the denoise process works on the UV channels in YUV colorspace and you have the option to adjust the relative noise reduction in each of these two channels. Or you can choose to denoise in RGB colorspace, by selecting this option from the dropdown menu. When RGB is enabled, the UV sliders are replaced by RGB sliders.

The following options are available:

U

Set to 1 by default.

The slider is limited to values between 0 and 1 but you can type values between 0 and 0 by clicking on the current value in the inspector.

V

Set to 1 by default.

The slider is limited to values between 0 and 1 but you can type values between 0 and 0 by clicking on the current value in the inspector.

R

Set to 1 by default.

The slider is limited to values between 0 and 1 but you can type values between 0 and 0 by clicking on the current value in the inspector.

G

Set to 1 by default.

The slider is limited to values between 0 and 1 but you can type values between 0 and 0 by clicking on the current value in the inspector.

B

Set to 1 by default.

The slider is limited to values between 0 and 1 but you can type values between 0 and 0 by clicking on the current value in the inspector.

SCREEN CLEAN

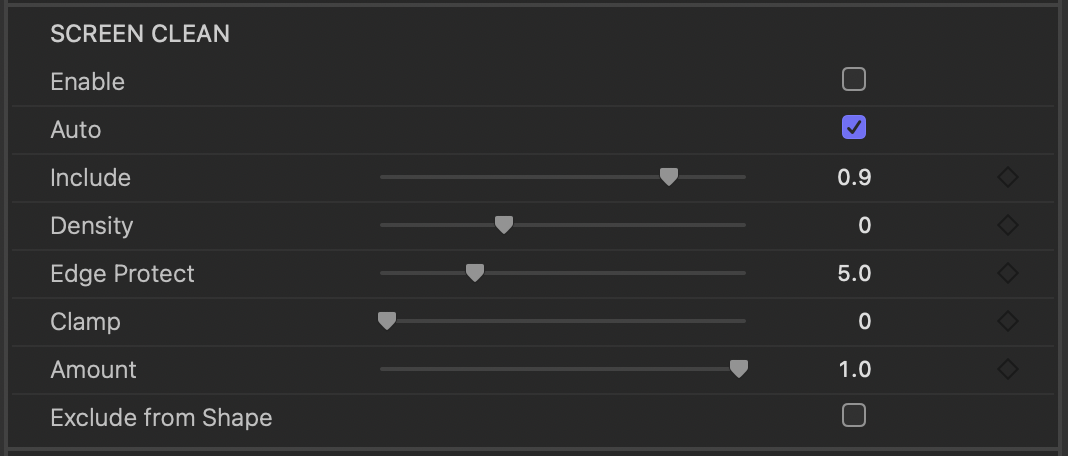
Screen Clean is a sophisticated screen correction function that intelligently analyses the green or blue screen backing to remove defects and create an even screen, making most keys a lot easier to pull.

It's not very often that one manages to shoot a perfectly even green or blue screen backing and sometimes the results can be very uneven indeed, which means that the keyer is having to work overtime to compensate and that inevitably compromises the overall result.

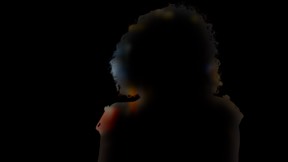
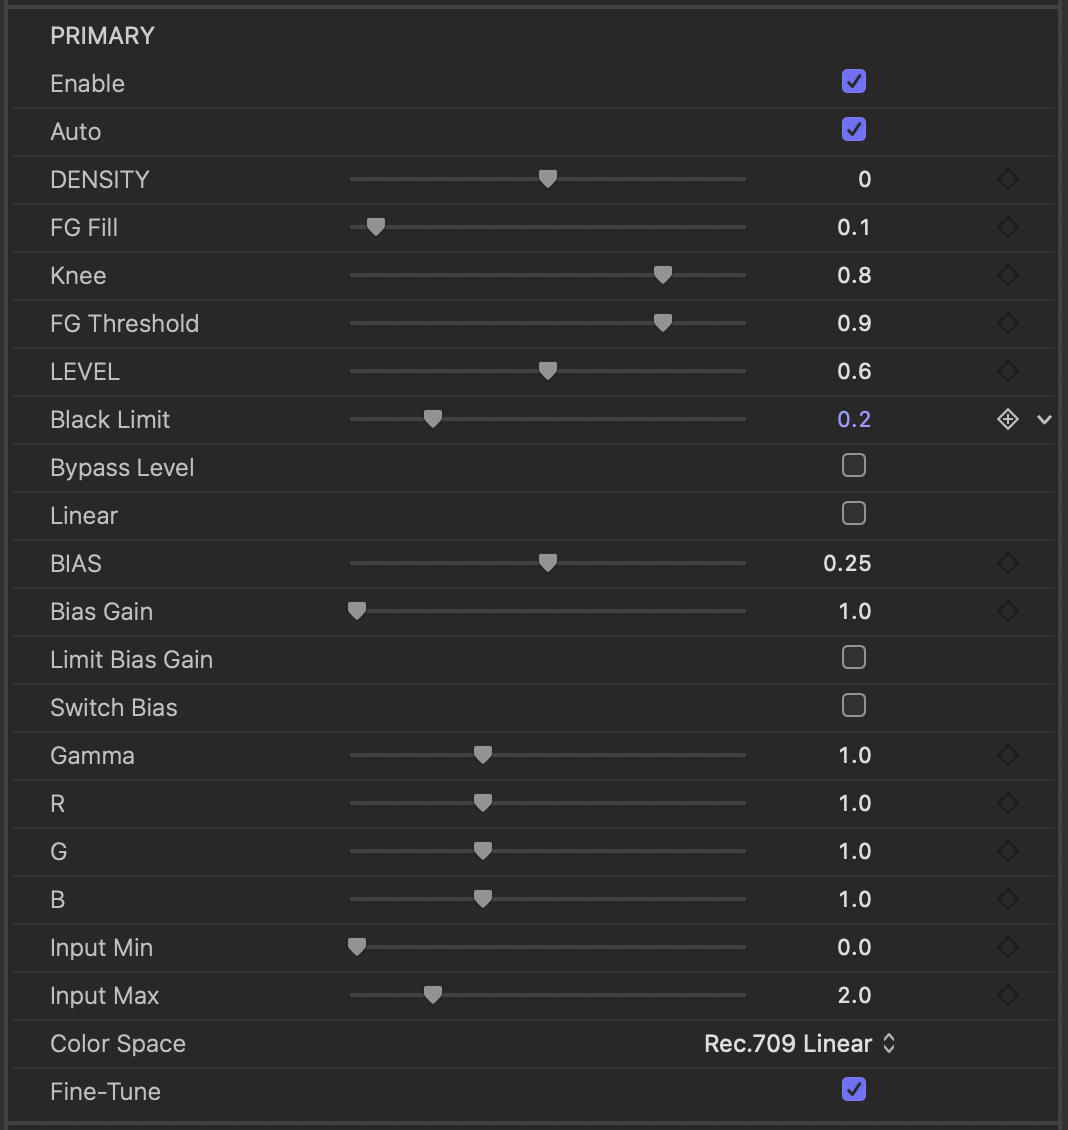
So while you can use the Density and Level controls to clear the darker parts of an uneven screen, often these patches are insufficiently distinct from the edge of the foreground, especially hair, and you lose edge detail in the process.

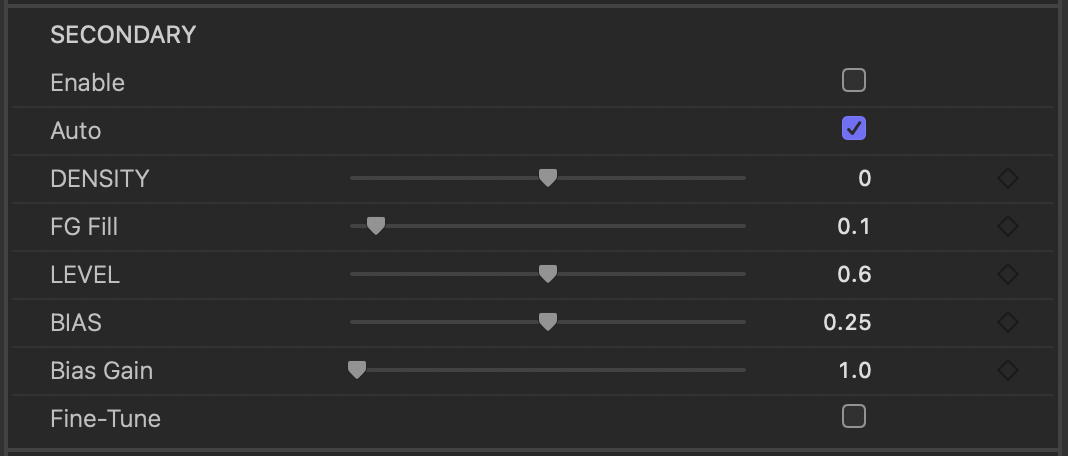
Screen Clean solves this problem - clearing the backing whilst preserving edges. It also frees up the Secondary keyer for further refinements rather than having to use it to clean up an uneven screen. Screen Clean can also benefit well lit screens - enhancing edge detail by smoothing out out the unevenness that is very close to the key subject.

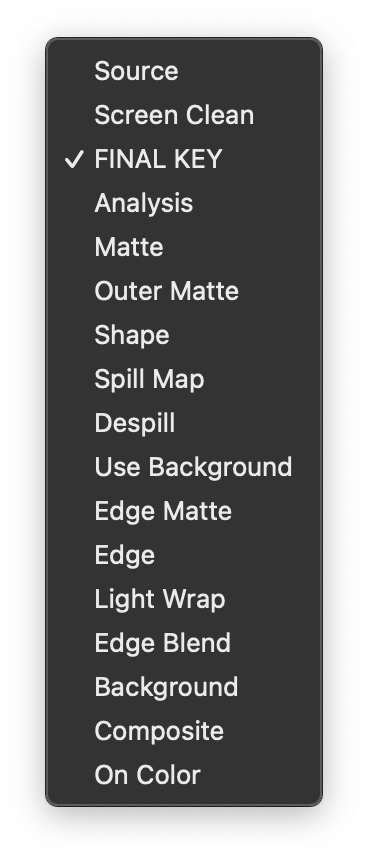
NB. The best view to evaluate Screen Clean is the Analysis view and we've also provided a dedicated Screen Clean view so you can see the results of the process.


Hawaiki Keyer Tutorial: Screen Clean

Enable

Off by default.

Auto

On by default.

Screen Clean's intelligent analysis is optimised to give the best possible result but you can manually override some of this. Disabling Auto brings up the option to make a pick of the screen. This colour is then used to smooth out defects in the screen.

Pick Screen

Visible when Auto is disabled. Clicking on the color swatch brings up the macOS color picker allowing you make a pick of the screen - switch the view mode to Source.

Include

Set to 0.9 by default.

The slider is limited to values between 0.5 and 1 but you can type values between 0 and 1 by clicking on the current value in the inspector.

The Include slider defines the areas of the screen that are to be replaced - increase the value to grab more of the screen but be careful to maintain edge detail.

Density

Set to 0 by default.

The slider is limited to values between -0.5 and 1 but you can type values between -0.5 and 2 by clicking on the current value in the inspector.

The Density slider has a very similar effect to the Density sliders in Primary and Secondary and can be used either on its own or in conjunction with these controls - increase it to clear more of the screen.

Edge Protect

Set to 5 by default.

The slider is limited to values between 0 and 20 but you can type values between 0 and 100 by clicking on the current value in the inspector.

Excludes the edges of the foreground from the process. Default works for most shots but you may need to increase on shots with a lot of spill.

Clamp

Set to 0 by default. Only values between 0 and 1 are allowed.

By default Screen Clean won't adjust brighter parts of the screen, as they will normally clear. However if they're less saturated than the rest of the screen you may need to level off these bright spots by increasing the Clamp slider.

Amount

Set to 1 by default.

The slider is limited to values between 0 and 1 but you can type values between 0 and 2 by clicking on the current value in the inspector.

Mix the cleaned screen with the source.

Exclude from Shape

Off by default.

Enable to exclude the Screen Clean process from the area inside the Shape matte. Makes it easier to pull a softer Secondary key while clearing the edges of the screen.

New in HK5

PRIMARY

The best way of working on creating a great-looking matte is to use the View menu and select the Analysis view mode which gives a color representation of the state of the matte. Solid foreground pixels will be orange and the transparent edge pixels will be blue. Pixels that show up yellow are on the verge of becoming transparent but will show up fully opaque in your final matte. To begin with, some of your background may be washed blue because it is not yet fully transparent. Note that using the Invert button with the Analysis view is a great way of picking up stray background pixels that are otherwise tricky to spot, so you may want to try that at the final clean-up stage of your matte.

Be sure to adjust all of these controls only as much as is necessary. If you go too far you will lose precious edge detail and that's something you really want to avoid.


Hawaiki Keyer Tutorial: Primary and Secondary - Basics

Enable

On by default.

Enable the Primary Key.

Auto

On by default.

Produces a key by extracting the screen color automatically for every frame and comparing that with every pixel in the image. The intelligent analysis in Hawaiki Keyer 5 is optimised to give the best possible result but you can manually override this. Disabling Auto brings up the option to make a pick of the screen.

Pick Screen

Visible when Auto is disabled. Clicking on the color swatch brings up the macOS color picker allowing you make a pick of the screen - switch the view mode to Source.

DENSITY

Set to 0 by default.

The slider is limited to values between -0.5 and 0.5 but you can type values between -1 and 0.99 by clicking on the current value in the inspector.

Use the density control to clear the backing. Switching on invert in Analysis mode can help show those stray pixels that have yet to be zeroed.

FG Fill

Set to 0.1 by default.

The slider is limited to values between 0 and 2 but you can type values between 0 and 5 by clicking on the current value in the inspector.

Once you have cleared your backing, you may need to firm up your foreground and remove transparent areas where there shouldn't be any. To do this all you have to do is use the FG Fill (foreground fill) slider and the easiest way of making sure you are doing the right thing is to use the Analysis view. Again, do this only just enough to solidify your foreground and make sure not to go too far. Wherever a pixel has turned orange (or yellow), you know that it is fully opaque - any that are still blue will be semi-transparent. Note that you want to make sure that your edges stay blue - the one thing you don't want is a hard edge to your matte as this will look very ugly and unrealistic. If you are having major problems with solidiying your foreground, then you will need to have a look at using Matte Cleaner (see below).

Knee

Set to 0.8 by default.

The slider is limited to values between 0 and 1 but you can type values between 0 and 0 by clicking on the current value in the inspector.

Sets the point at which the FG Fill kicks in. Reduce it to add more transparency to the edges, increase it to solidify the edges.

Displayed when the Fine-Tune checkbox is enabled.

FG Threshold

Set to 0.9 by default.

The slider is limited to values between 0.5 and 1 but you can type values between 0 and 1 by clicking on the current value in the inspector.

Works like a white clip control but earlier in the matte extraction process so the effect is more subtle. Reduce it to solidify the foreground, increase it to give the edges of the foreground greater transparency.

Displayed when the Fine-Tune checkbox is enabled.

LEVEL

Set to 0.8 by default.

The slider is limited to values between 0.2 and 1 but you can type values between 0.01 and 1 by clicking on the current value in the inspector.

Adjusts the level of the screen. In general increasing level (from the default) can help clear the backing, decreasing reclaim edge detail, but it will depend on the shot and what you are seeing in the Analysis view. We’ve noticed most of the clips users sent us had backings that were underexposed. Level is our answer to that. It uses a novel algorithm that helps clear the backing whilst maximising edge detail. NB. Some very bright screens may require you bypass the level control altogether and there is a checkbox for this when Fine-Tune is enabled.

Black Limit

Set to 0.2 by default. Only values between 0 and 1 are allowed.

Limits the Level process to prevent dark parts of the FG from eroding. If you have a screen with dark patches that won’t clear then reduce the amount.

Displayed when the Fine-Tune checkbox is enabled.

Bypass Level

Off by default.

Bypasses the level control - may be required on some screens (especially very bright stock shots).

Displayed when the Fine-Tune checkbox is enabled.

Linear

On by default.

Changes the basic curve used when comparing the screen to the foreground. For green screens we’ve come up with a custom curve - enabling Linear turns this off. Linear is on by default with blue screens. If when keying a green screen you find your edges are too soft you may wish to enable this. Note it will make it harder to clear dark parts of the backing but the level control can help here. NB. Enabling Linear also changes the way the Matte group gain and gamma controls work.

Displayed when the Fine-Tune checkbox is enabled.

BIAS

Set to 0.25 by default.

The slider is limited to values between -0.5 and 1 but you can type values between -1 and 2 by clicking on the current value in the inspector.

HK5 is a sophisticated color difference keyer - in essence it works by comparing the dominant channel of the screen (green or blue) with the other two channels (red and blue for a green screen, red and green for a blue screen) Bias allows you to use one or the other of those other channels or a mix of the two. The setting that works best is very much dependent on not only the colour balance of the screen but also of the foreground. We’re working on automating this but in the meantime it is largely a process of trial and error.

Bias Gain

Set to 1 by default.

The slider is limited to values between 1 and 2 but you can type values between 0 and 5 by clicking on the current value in the inspector.

Adjust the gain of the channel or channels set with the Bias control - it can be useful for solidifying the foreground in away that produces a smoother gradient at the edges than FG Fill.

Limit Bias Gain

Off by default.

Limits the Bias gain to the foreground. Allows you to push Bias Gain so as to keep the foreground solid whilst adjusting the Bias and Switch Bias controls in a way that clears the backing e.g you can switch Bias to use the min channel whilst maintaining a solid foreground.

Displayed when the Fine-Tune checkbox is enabled.

Switch Bias

Off by default.

Lets you specify the channels used rather than using the maximum and minimum. When enabled in HK5 Green 0 becomes the red channel and 1 blue and in HK5 Blue 0 is the green channel and 1 red. Like the main Bias slider this is a control best experimented with.

Displayed when the Fine-Tune checkbox is enabled.

Gamma

Set to 1 by default.

The slider is limited to values between 0.01 and 3 but you can type values between 0.01 and 10 by clicking on the current value in the inspector.

Adjusts the gamma and color (RGB) balance of the shot being sent into the keyer. Really useful for dealing with problematic shots. When used in tandem with the bias controls quite sophisticated results can be achieved.

Displayed when the Fine-Tune checkbox is enabled.

R

Set to 1 by default.

The slider is limited to values between 0.01 and 3 but you can type values between 0.01 and 10 by clicking on the current value in the inspector.

Adjust the gamma of the red channel.

Displayed when the Fine-Tune checkbox is enabled.

G

Set to 1 by default.

The slider is limited to values between 0.01 and 3 but you can type values between 0.01 and 10 by clicking on the current value in the inspector.

Adjust the gamma of the green channel.

Displayed when the Fine-Tune checkbox is enabled.

B

Set to 1 by default.

The slider is limited to values between 0.01 and 3 but you can type values between 0.01 and 10 by clicking on the current value in the inspector.

Adjust the gamma of the blue channel.

Displayed when the Fine-Tune checkbox is enabled.

Input Min

Set to 0 by default.

The slider is limited to values between 0 and 1 but you can type values between -10 and 10 by clicking on the current value in the inspector.

Set the minimum value of the input to the Primary key.

Displayed when the Fine-Tune checkbox is enabled.

New in HK5

Input Max

Set to 2 by default.

The slider is limited to values between 0 and 10 but you can type values between 0 and 1000 by clicking on the current value in the inspector.

Set the maximum value of the input to the Primary key.

Displayed when the Fine-Tune checkbox is enabled.

New in HK5

Color Space

Adjust the color space of the input to the Primary key.

Displayed when the Fine-Tune checkbox is enabled.

New in HK5

The following options are available:

Fine-Tune

Off by default.

Enable to display additional controls in the Primary group that allow you to refine and fine-tune the Primary key.

New in HK5


SECONDARY

When you engage Secondary you have easy access to two keyers in one and it's a very easy job to break up your shot into two distinct areas so as to get the best result for each one. This is especially advisable for preserving hair detail which is usually the first thing to suffer when you try to make one key do all the work.

The controls for the trackable shape matte that is used to qualify the Primary and Secondary keyers can be found in the Shape group.


Hawaiki Keyer Tutorial: Primary and Secondary - Basics

Enable

Off by default.

Enable the Secondary Key.

Auto

On by default.

Produces a key by extracting the screen color automatically for every frame and comparing that with every pixel in the image. The intelligent analysis in Hawaiki Keyer 5 is optimised to give the best possible result but you can manually override this. Disabling Auto brings up the option to make a pick of the screen.

Pick Screen

Visible when Auto is disabled. Clicking on the color swatch brings up the macOS color picker allowing you make a pick of the screen - switch the view mode to Source.

DENSITY

Set to 0 by default.

The slider is limited to values between -0.5 and 0.5 but you can type values between -1 and 0.99 by clicking on the current value in the inspector.

Use the density control to clear the backing. Switching on invert in Analysis mode can help show those stray pixels that have yet to be zeroed.

FG Fill

Set to 0.1 by default.

The slider is limited to values between 0 and 2 but you can type values between 0 and 5 by clicking on the current value in the inspector.

Once you have cleared your backing, you may need to firm up your foreground and remove transparent areas where there shouldn't be any. To do this all you have to do is use the FG Fill (foreground fill) slider and the easiest way of making sure you are doing the right thing is to use the Analysis view. Again, do this only just enough to solidify your foreground and make sure not to go too far. Wherever a pixel has turned orange (or yellow), you know that it is fully opaque - any that are still blue will be semi-transparent. Note that you want to make sure that your edges stay blue - the one thing you don't want is a hard edge to your matte as this will look very ugly and unrealistic. If you are having major problems with solidiying your foreground, then you will need to have a look at using Matte Cleaner (see below).

Knee

Set to 0.8 by default.

The slider is limited to values between 0 and 1 but you can type values between 0 and 0 by clicking on the current value in the inspector.

Sets the point at which the FG Fill kicks in. Reduce it to add more transparency to the edges, increase it to solidify the edges.

Displayed when the Fine-Tune checkbox is enabled.

FG Threshold

Set to 0.9 by default.

The slider is limited to values between 0.5 and 1 but you can type values between 0 and 1 by clicking on the current value in the inspector.

Works like a white clip control but earlier in the matte extraction process so the effect is more subtle. Reduce it to solidify the foreground, increase it to give the edges of the foreground greater transparency.

Displayed when the Fine-Tune checkbox is enabled.

LEVEL

Set to 0.8 by default.

The slider is limited to values between 0.2 and 1 but you can type values between 0.01 and 1 by clicking on the current value in the inspector.

Adjusts the level of the screen. In general increasing level (from the default) can help clear the backing, decreasing reclaim edge detail, but it will depend on the shot and what you are seeing in the Analysis view. We’ve noticed most of the clips users sent us had backings that were underexposed. Level is our answer to that. It uses a novel algorithm that helps clear the backing whilst maximising edge detail. NB. Some very bright screens may require you bypass the level control altogether and there is a checkbox for this when Fine-Tune is enabled.

Black Limit

Set to 0.2 by default.

The slider is limited to values between 0 and 1 but you can type values between 0 and 0 by clicking on the current value in the inspector.

Limits the Level process to prevent dark parts of the FG from eroding. If you have a screen with dark patches that won’t clear then reduce the amount.

Displayed when the Fine-Tune checkbox is enabled.

Bypass Level

Off by default.

Bypasses the level control - may be required on some screens (especially very bright stock shots).

Displayed when the Fine-Tune checkbox is enabled.

Linear

On by default.

Changes the basic curve used when comparing the screen to the foreground. For green screens we’ve come up with a custom curve - enabling Linear turns this off. Linear is on by default with blue screens. If when keying a green screen you find your edges are too soft you may wish to enable this. Note it will make it harder to clear dark parts of the backing but the level control can help here. NB. Enabling Linear also changes the way the Matte group gain and gamma controls work.

Displayed when the Fine-Tune checkbox is enabled.

BIAS

Set to 0.25 by default.

The slider is limited to values between -0.5 and 1 but you can type values between -1 and 2 by clicking on the current value in the inspector.

HK5 is a sophisticated color difference keyer - in essence it works by comparing the dominant channel of the screen (green or blue) with the other two channels (red and blue for a green screen, red and green for a blue screen) Bias allows you to use one or the other of those other channels or a mix of the two. The setting that works best is very much dependent on not only the colour balance of the screen but also of the foreground. We’re working on automating this but in the meantime it is largely a process of trial and error.

Bias Gain

Set to 1 by default.

The slider is limited to values between 1 and 2 but you can type values between 0 and 5 by clicking on the current value in the inspector.

Adjust the gain of the channel or channels set with the Bias control - it can be useful for solidifying the foreground in away that produces a smoother gradient at the edges than FG Fill.

Limit Bias Gain

Off by default.

Limits the Bias gain to the foreground. Allows you to push Bias Gain so as to keep the foreground solid whilst adjusting the Bias and Switch Bias controls in a way that clears the backing e.g you can switch Bias to use the min channel whilst maintaining a solid foreground.

Displayed when the Fine-Tune checkbox is enabled.

Switch Bias

Off by default.

Lets you specify the channels used rather than using the maximum and minimum. When enabled in HK5 Green 0 becomes the red channel and 1 blue and in HK5 Blue 0 is the green channel and 1 red. Like the main Bias slider this is a control best experimented with.

Displayed when the Fine-Tune checkbox is enabled.

Gamma

Set to 1 by default.

The slider is limited to values between 0.01 and 3 but you can type values between 0.01 and 10 by clicking on the current value in the inspector.

Adjusts the gamma and color (RGB) balance of the shot being sent into the keyer. Really useful for dealing with problematic shots. When used in tandem with the bias controls quite sophisticated results can be achieved.

Displayed when the Fine-Tune checkbox is enabled.

R

Set to 1 by default.

The slider is limited to values between 0.01 and 3 but you can type values between 0.01 and 10 by clicking on the current value in the inspector.

Adjust the gamma of the red channel.

Displayed when the Fine-Tune checkbox is enabled.

G

Set to 1 by default.

The slider is limited to values between 0.01 and 3 but you can type values between 0.01 and 10 by clicking on the current value in the inspector.

Adjust the gamma of the green channel.

Displayed when the Fine-Tune checkbox is enabled.

B

Set to 1 by default.

The slider is limited to values between 0.01 and 3 but you can type values between 0.01 and 10 by clicking on the current value in the inspector.

Adjust the gamma of the blue channel.

Displayed when the Fine-Tune checkbox is enabled.

Input Min

Set to 0 by default.

The slider is limited to values between 0 and 1 but you can type values between -10 and 10 by clicking on the current value in the inspector.

Set the minimum value of the input to the Secondary key.

Displayed when the Fine-Tune checkbox is enabled.

New in HK5

Input Max

Set to 2 by default.

The slider is limited to values between 0 and 10 but you can type values between 0 and 1000 by clicking on the current value in the inspector.

Set the maximum value of the input to the Secondary key.

Displayed when the Fine-Tune checkbox is enabled.

New in HK5

Color Space

Adjust the color space of the input to the Secondary key.

Displayed when the Fine-Tune checkbox is enabled.

New in HK5

The following options are available:

Fine-Tune

Off by default.

Enable to display additional controls in the Secondary group that allow you to refine and fine-tune the Secondary key.

New in HK5


SHAPE

Set the shape matte that is used to qualify the Primary and Secondary keyers. Control the size and position of the shape matte with onscreen controls which replace the sliders used in Hawaiki Keyer 4.

Set the shape matte with onscreen controls

Set the shape matte with onscreen controls

NB. For the Shape OSCs to appear onscreen the plug-in must be selected. Click on the plug-in title in the Inspector/Effect Control panel to do this.

As with Hawaiki Keyer 4, when Secondary is enabled, the Secondary key is applied within the shape matte and the Primary key outside of it.

New in Hawaiki Keyer 5 the shape matte can also be used as a garbage matte (or, when inverted, holdout matte) with either the Primary or Secondary keys. By default when Shape is enabled and Secondary disabled the shape matte works on the Primary key.

Enable Secondary and disable Primary to have the Shape matte work with just the Secondary keyer. This can be a useful way to test different keying strategies by switching between the two keys.

New in HK5

@[](help/HK5_Shape@2x.png

Enable

Off by default.

NB. If both Primary and Secondary are enabled then Shape is automatically enabled and the Enable checkbox is not shown.

Guide

On by default.

Guide - When enabled a white outline showing the edge of the shape matte is displayed. When softness is greater than zero a grey outline is also shown.

NB. This is disabled automatically whenever the Final Key view is selected.

Roundness

Set to 0 by default.

The slider is limited to values between 0 and 1 but you can type values between -∞ and +∞ by clicking on the current value in the inspector.

Adjust in tandem with the onscreen controls to create a range of squares, circles, rectangles and ovals.

Softness

Set to 0.2 by default.

The slider is limited to values between 0 and 1 but you can type values between 0 and 2 by clicking on the current value in the inspector.

Adjust the softness or feathering of the matte - a second grey outline is present when softness is greater than zero.

Gain

Set to 1 by default.

The slider is limited to values between 0 and 2 but you can type values between 0 and 100 by clicking on the current value in the inspector.

Adjust the gain of the shape matte.

New in HK5

Angle

Set to by default.

Value must be between and .

Rotate the matte.

Invert

Off by default.

Inverts the shape matte.

Will swap the Primary and Secondary keyers when both of them are enabled or change the shape matte from a garbage matte to a holdout matte when only one is enabled.

TRACKER

TRACK

Off by default.

Tracking

Hawaiki Keyer now provides automatic tracking of the edges of your foreground subject as well as centre tracking. Both modes work with the new AI-powered face and object tracking.


Mode

Either track the centre of the foreground subject - setting the shape matte with the onscreen controls, or track the edges of the foreground automatically and refine with the Scale sliders that appear.

New in HK5


The following options are available:

AI Track

Off by default.

AI-powered tracking of faces and objects.

Use the Track Target menu to choose to track either faces or objects (normally people).

Face tracking is useful for creating trackable head mattes that allow you to pull a secondary key on the subject’s hair.

Object tracking is an alternative to the standard Hawaiki Keyer tracking. It’s a good option when the screen doesn’t cover the entire shot, when a light or other fixture is in the shot or if the screen has a lot of tracking markers.

AI Track works with both centre and edges tracking modes. Centre works best for face tracking if the subject’s distance to the camera doesn’t change. If the subject is moving away from or towards the camera you can use the Edges mode and the scale controls to create a head matte that automatically resizes.

With Object tracking set to edges you can create a dynamic garbage matte that isolates the subject.

New in HK5


Track Target

Set the AI Tracker to track either faces or objects in the frame. The object tracking aims to pick the main subject of the shot, which is usually people.

The following options are available:

Multiple Targets

Off by default.

Enable if there is more than one person or object in the shot and you wish to create a shape matte for each of them.

Select Targets

Off by default.

Select a single face or object

Select a single face or object

Use the Target slider to pick the face or object to track. Targets are selected left to right.

Select multiple targets

Select multiple targets

When Multiple is selected you can choose which faces or objects to include using the Target sliders. Target 1 is the leftmost face, Target 6 the rightmost. The slider can be set to 1 - select the target or 0 - ignore the target. The controls are presented as sliders rather than checkboxes so they can be keyframed.

NB. The Track Area controls can also be used to exclude particular faces and objects.

Target

Set to 1 by default.

The slider is limited to values between 1 and 6 but you can type values between 1 and 100 by clicking on the current value in the inspector.

Select the face or object to track. Targets are selected left to right i.e the leftmost face or object is chosen with a slider value of 1. The slider goes up to 6 but values greater than this can be entered if you have more than 6 targets in the shot.

Target 1

Set to 1 by default. Only values between 0 and 1 are allowed.

The slider can be set to 1 - select the target or 0 - ignore the target.

Target 2

Set to 1 by default. Only values between 0 and 1 are allowed.

The slider can be set to 1 - select the target or 0 - ignore the target.

Target 3

Set to 1 by default. Only values between 0 and 1 are allowed.

The slider can be set to 1 - select the target or 0 - ignore the target.

Target 4

Set to 1 by default. Only values between 0 and 1 are allowed.

The slider can be set to 1 - select the target or 0 - ignore the target.

Target 5

Set to 1 by default. Only values between 0 and 1 are allowed.

The slider can be set to 1 - select the target or 0 - ignore the target.

Target 6

Set to 1 by default. Only values between 0 and 1 are allowed.

The slider can be set to 1 - select the target or 0 - ignore the target.

Offset X

Set to 0 by default.

The slider is limited to values between -0.25 and 0.25 but you can type values between -1 and 1 by clicking on the current value in the inspector.

Manually offset the tracked shape matte horizontally.

Offset Y

Set to 0 by default.

The slider is limited to values between -0.25 and 0.25 but you can type values between -1 and 1 by clicking on the current value in the inspector.

Manually offset the tracked shape matte vertically.

SCALE

Set to 0 by default.

The slider is limited to values between -1 and 1 but you can type values between -1 and 100 by clicking on the current value in the inspector.

Scale the tracked shape matte.

Displayed when Mode is set to Edges.

Left

Set to 0 by default.

The slider is limited to values between -1 and 1 but you can type values between -1 and 100 by clicking on the current value in the inspector.

Scale the left edge of the tracked shape matte.

Displayed when Mode is set to Edges.

Right

Set to 0 by default.

The slider is limited to values between -1 and 1 but you can type values between -1 and 100 by clicking on the current value in the inspector.

Scale the right edge of the tracked shape matte.

Displayed when Mode is set to Edges.

Bottom

Set to 0 by default.

The slider is limited to values between -1 and 1 but you can type values between -1 and 100 by clicking on the current value in the inspector.

Scale the bottom edge of the tracked shape matte.

Displayed when Mode is set to Edges.

Top

Set to 0 by default.

The slider is limited to values between -1 and 1 but you can type values between -1 and 100 by clicking on the current value in the inspector.

Scale the top edge of the tracked shape matte.

Displayed when Mode is set to Edges.

Track X

On by default.

Enables Tracking in the X axis i.e the secondary matte will follow the horizontal movement of foreground elements within the Track Area.

Displayed when Mode is set to Centre

Track Y

On by default.

Enables Tracking in the Y axis i.e the secondary matte will follow the vertical movement of foreground elements within the Track Area.

Displayed when Mode is set to Centre

Track Left

On by default.

Track the left edge of the foreground. When disabled the position of the shape matte will be set by one of the onscreen controls.

Displayed when Mode is set to Edges.

Track Right

On by default.

Track the right edge of the foreground. When disabled the position of the shape matte will be set by one of the onscreen controls.

Displayed when Mode is set to Edges.

Track Bottom

On by default.

Track the bottom edge of the foreground. When disabled the position of the shape matte will be set by one of the onscreen controls.

Displayed when Mode is set to Edges.

Track Top

On by default.

Track the top edge of the foreground. When disabled the position of the shape matte will be set by one of the onscreen controls.

Displayed when Mode is set to Edges.

Sensitivity

Set to 0.5 by default.

The slider is limited to values between 0 and 1 but you can type values between -1 and 2 by clicking on the current value in the inspector.

New Sensitivity slider (most useful when Mode is set to Edges) : Increase sensitivity to expand what the tracker sees as foreground - useful to pick up areas with heavy spill that the tracker is excluding such as the edges of hair. Decrease Sensitivity to reduce what is defined as foreground - can be helpful if stray lighting and reflections are being picked up as foreground.

NB. This slider is not shown when Face Track is enabled.

TRACK AREA

Set the maximum part of the frame that is used when tracking to either the whole frame, the area defined in Crop or to the onscreeen controls (setting to OSCs is best used when Track Mode is set to Edges). Then further refine with the Left, Right, Bottom, Top sliders which work relative to the box defined in Track Area.

Red lines will appear on screen to show the area being tracked.

NB. You will generally want to exclude from the Track Area: anything in the frame that is not going to be in the final composite e.g lights,mics, areas of the frame not covered by the green screen; static objects; moving objects you don't want masked by the Shape matte.

New in HK5


The following options are available:

Left

Set to 0 by default.

The slider is limited to values between 0 and 1 but you can type values between -10 and 10 by clicking on the current value in the inspector.

Right

Set to 1 by default.

The slider is limited to values between 0 and 1 but you can type values between -10 and 10 by clicking on the current value in the inspector.

Bottom

Set to 0 by default.

The slider is limited to values between 0 and 1 but you can type values between -10 and 10 by clicking on the current value in the inspector.

Top

Set to 1 by default.

The slider is limited to values between 0 and 1 but you can type values between -10 and 10 by clicking on the current value in the inspector.

BL

A point parameter.

Initial location in the frame
How do I adjust the location on-screen?

Onscreen Control for the bottom left of the shape matte.

New in HK5

TR

A point parameter.

Initial location in the frame
How do I adjust the location on-screen?

Onscreen Control for the top right of the shape matte.

New in HK5

MATTE

The Matte group comprises a variety of tools for cleaning up, refining the matte and dealing with specific problems - these are all best used once you have done everything you can with Density and Pre-Qualify. The tools include Black and White Clip, Gamma, Matte Shrink,Matte Blur and Matte Cleaner (with Fill Holes option), and Outer Matte.


Enable

On by default.

Enable the matte controls.

New in HK5

Gain

Set to 1 by default.

The slider is limited to values between 0 and 3 but you can type values between 0 and 10 by clicking on the current value in the inspector.

Scales the matte. Works in a similar way to the Density control in Primary and Secondary - increasing it will help clean up the background - but across both mattes and in a way that is less prone to eroding the foreground when pushed. That said it is best to exhaust the possibilites of the Level,Density and Bias controls before turning to Matte Gain.

Gamma

Set to 1 by default.

The slider is limited to values between 0.01 and 3 but you can type values between 0.01 and 10 by clicking on the current value in the inspector.

The Gamma slider performs the magic trick of making your transparent edges either more opaque or more transparent - increase the value for greater transparency and reduce it for increased opacity. This is a great control for making your edges look more realistic, but, as always, be sure to use it gently and don't overcook the results.

Clip Black

Set to 0 by default. Only values between 0 and 0.99 are allowed.

The black and white Clips allow you to adjust the matte in the conventional way, in other words by clipping either the black or white values or both - clipping the black cleans up the background, and clipping the white solidifies the foreground. Note that while this common process can be useful for fine-tuning an almost perfect matte, it's not recommended to use them to do the heavy lifting of extracting the matte in the first place. Hawaiki's unique and much more refined and targeted level,density and bias controls will give you a superior result every time.

Clip White

Set to 1 by default. Only values between 0.01 and 1 are allowed.

Shrink - Grow

Set to 0 by default.

The slider is limited to values between -5 and 5 but you can type values between -50 and 50 by clicking on the current value in the inspector.

You shouldn't ever really need to shrink (or grow) your matte, as Hawaiki Keyer gives you so many great tools for creating a great-looking edge, but if you do need to shrink it for any reason, then use the Shrink - Grow slider. Again, try to ration yourself as much as possible - a matte that has been visibly shrunk is not a professional-looking matte! If you facing the kind of desperate situation where Shrink - Grow is needed, you may need to use it in conjunction with a small amount of Edge Blur (see below).

New in HK5

Blur

Set to 0 by default.

The slider is limited to values between 0 and 10 but you can type values between 0 and 100 by clicking on the current value in the inspector.

Blurs the matte using a gaussian blur. The slider sets the blur radius.

In general, you want to avoid blurring your matte wherever you can to preserve as much fine detail as possible, but sometimes if your green/blue screen is not as good as it should be, you'll have unwanted "stepping" or aliasing of your edges, or some of the processing you have applied may have made them look a bit too sharp. If this is the case, your first step should be to make sure you have enabled Denoise (see above) which is specifically designed to deal with this type of issue and will handle it really beautifully and smoothly without compromising your matte. If your footage is really poor and Denoise doesn't get you far enough only then should you consider using Blur - after having first fired your cameraman and/or thrown away your camera!

If you are encountering serious aliasing problems, it usually means that you've over-processed the matte somewhere or other. Make sure you go back and review your previous decisions to see if you can improve on them before trying Blur. Hawaiki Keyer gives you more options for refining your matte than any other keyer so you should usually be able to find a good way of treating the problem without having to resort to blur.

MATTE CLEANER

Off by default.

Matte Cleaner

Matte Cleaner is designed to help you deal with problem areas in your foreground that refuse to go solid. At extreme settings you can use Matte Cleaner to force fill "holes" in your foreground caused by reflections or foreground colors that too closely match the background screen color. Check the Matte Cleaner switch to enable this option, and adjust the Amount slider as necessary. For advanced hole filling operations you will probably also want to use the Fill Holes slider which helps to force the filler into more of the holes.

Note that while Matte Cleaner is a really powerful tool, like any keying control you want to make sure that you only use as much as you actually need and no more - at extreme settings you can risk compromising your edges, so keep an eye on them to make sure you're doing enough but no more.

COMPOSITING TIP: If your foreground holes are caused by reflections, it's worth knowing that filling them in is not always the best-looking option. Being reflections they should ideally be reflecting your environment, and in your final composite that environment isn't the flat color of your despilled green/blue screen (which is what it will be if you fill them in), but rather it ought to be the color of the new background and any detail it may contain. Hence leaving your holes see-through will often have the effect of making them look more like real reflections and your composite will look better as a result.


Amount

Set to 0.1 by default.

The slider is limited to values between 0 and 1 but you can type values between 0 and 0 by clicking on the current value in the inspector.

Fill Holes

Set to 0 by default.

The slider is limited to values between 0 and 20 but you can type values between 0 and 50 by clicking on the current value in the inspector.

OUTER MATTE

Off by default.

Outer Matte

The Outer Matte helps take care of the outer regions of the background and makes them fully transparent. The Outer Matte is disabled by default - use the checkbox to turn it on.

The Outer Matte keeps clear of the edges of the main matte so as not to lose any detail, but you can increase the clearance if necessary using the Expand slider.

Note that the Outer Matte is usually large enough (or can be expanded enough) to keep well out of the way of the Main Matte in most cases. However, if you have lots of large areas of transparency that you need to keep, it's best to leave the Outer Matte turned off to avoid fighting with those areas.


Expand

Set to 20 by default.

The slider is limited to values between 5 and 50 but you can type values between 5 and 400 by clicking on the current value in the inspector.

DESPILL

The spill suppression provided in Hawaiki Keyer is very powerful with a lot of fine control of the results - more than you'll find in most keyers at any level. Spill suppresssion works by isolating the areas of your foreground that are contaminated with excess amounts of the background screen color and replacing it with something less offensive.

Overview - Unlike some well-known keyers, the despill operation in Hawaiki Keyer is entirely separate from the matte extraction operation and will not be affected by the matte that you pull. Obviously a softer matte will show more of the despilled background than a very hard matte that crunches away too much of the edge detail but other than that there is no interaction between the two operations, and it is our view that this is a much better way of working. Too often with other systems, you end up chasing your tail between getting the matte right and getting the despill right and Hawaiki Keyer takes away that frustration.

Because despill by definition is removing green (or blue), an unmodified despill process inevitably results in a darkening of the despilled areas (less green/blue means less overall luminance). For this reason, Hawaiki Keyer 5 uses an automatic process to adjust for this, which is designed to compensate for the darkening (and also the desaturation). However the automated process is simply designed to get you close enough to a sensible starting point with the option to over-ride the result manually as required.

This is because there is obviously no "ideal" setting that will make a perfect composite for every shot - if you have a dark background, you want the despilled edge to be dark and if you have a bright background you want it to be bright. This is where the deep layer of control within the despill section really comes into play - you can manually over-ride the brightness, as well as the saturation and even play with the color balance.


Enable

On by default.

Enable the Despill operation.

New in HK5

Brightness

Set to 0 by default.

The slider is limited to values between -1 and 1 but you can type values between -2 and 2 by clicking on the current value in the inspector.

The Brightness control lets you make manual adjustments to the brightness of the despill.

Saturation

Set to 0 by default. Only values between -5 and 5 are allowed.

The Saturation control lets you fine tune the saturation of the despilled areas, either to reduce it or increase it as required.

R

Set to 0 by default.

The slider is limited to values between -1 and 1 but you can type values between -2 and 2 by clicking on the current value in the inspector.

The three RGB sliders let you adjust the color of the despilled areas directly and intuitively for really fine-grained control of the result.

G

Set to 0 by default.

The slider is limited to values between -1 and 1 but you can type values between -2 and 2 by clicking on the current value in the inspector.

B

Set to 0 by default.

The slider is limited to values between -1 and 1 but you can type values between -2 and 2 by clicking on the current value in the inspector.

Restore Luminance

Set to 1 by default.

The slider is limited to values between 0 and 1 but you can type values between 0 and 2 by clicking on the current value in the inspector.

This controls the amount of the automated luminance correction. A value of 1.0 matches the luminance of the despilled image to the luminance of the source. A value of zero turns off the auto process.

NB. You may need to increase Brightness or increase Restore Luminance (you can enter values above the max slider value of 1) to match very bright backgrounds.

Amount

Set to 1 by default. Only values between 0 and 2 are allowed.

Use the Amount slider to increase or decrease the degree of spill suppression being applied.

SPILL MAP Depth

Set to 0.25 by default.

The slider is limited to values between -0.25 and 0.5 but you can type values between -0.25 and 1 by clicking on the current value in the inspector.

Spill Map

When setting up the spill suppression operation it's a good idea to use the Spill Map view to see exactly what's going on and fine tune the despill process to the demands of your particular shot. The Spill Map defines the specific areas that will be de-contaminated and with Hawaiki Keyer, unlike most keyers on the market, you have total control over how this works.

Reading the Spill Map view - Looking at the straight Spill Map view first, where the foreground is cyan, there's no spill being removed but the more pink there is, the more intense the despill process. And the spill map view will update as you make changes to the Amount, the Spill Map Depth, or the Balance.

Despill works by referencing the red, green and blue channels and removing any green (or blue, as the case may be) that exceeds the value of either (or both) of the other two. In this way you can control not only which areas are being despilled but also have some control over the resulting colors.

Use the Spill Map Depth control to increase the intensity of the Spill Map as necessary. This will enable you to target areas with only slight contamination but which you still want to despill.


Balance

Set to 0.75 by default.

The slider is limited to values between 0 and 1 but you can type values between 0 and 0 by clicking on the current value in the inspector.

Adjusts the degree to which the Red or Blue are referenced (in the case of green screen, or Red and Green in the case of blue screen).

R

Set to 1 by default. Only values between 0 and 2 are allowed.

Use the Spill Map Red and Blue sliders to make precise adjustments to the areas that will be despilled (or the Red and Green in the case of a blue screen).

G

Set to 1 by default. Only values between 0 and 2 are allowed.

Color Space

Adjust the color space used in the Despill process.

Rec.709 Linear (the default) provides the most neutral look, even with HDR material. Select Rec.2020 Linear, ACEScg or Display P3 Linear for a different look - normally the resulting despilled image is slightly warmer.

New in HK5

The following options are available:

USE BACKGROUND

Off by default.

Use Background uses the color of the Background image to colorize the areas of spill on the edge of the foreground. The area of the foreground replaced can be seen in the Use Background view, which will update when you adjust the controls below.

NB. The Use Background view will also update when the main Despill parameters are changed.

Areas of the foreground are only replaced where there is spill, shown as pink in the Spill Map view (more precisely, the Use Background matte is the intersection of a custom edge matte with the Spill Map). This means that areas of the Spill Map that are cyan will not be colorized. It also means that changes to the Spill Map controls will change the intensity of the Use Background process.

IMPORTANT NOTE: - It's important to note that in order to use this feature, you need to add your background image to the Background source well. Without a background image being fed to the plug-in, you won't get the desired result.


Hawaiki Keyer Tutorial: Despill - Use Background

Amount

Set to 1 by default.

The slider is limited to values between 0 and 1 but you can type values between 0 and 2 by clicking on the current value in the inspector.

Controls the mix of the original despilled image with the background image - a setting of 0 will turn it off

Depth

Set to 3 by default.

The slider is limited to values between 1 and 10 but you can type values between 0 and 20 by clicking on the current value in the inspector.

Sets the distance into the foreground that the spill is replaced with the background i.e the width of the custom edge matte employed by Use Background.

Density

Set to 3 by default.

The slider is limited to values between 0 and 5 but you can type values between 0 and 10 by clicking on the current value in the inspector.

Modifies the intensity of the Use Background process by changing the density of the custom edge matte.

WHITE BALANCE

Allows you to white balance by picking either an area of white/grey or skin. You can choose to balance the Matte input (which can assist with pulling the key if the White Balance is badly off), or the Image (as a starting point for color correction and/or to assist the despill process) or both.


Pick

Clicking on the color swatch brings up the macOS color picker allowing you make a pick of the screen.

Matte

Off by default.

Enable to white balance the input to the matte extraction (keying) process.

Image

Off by default.

Enable to white balance the despilled and color corrected foreground image.

Type

Choose white to pick an area of the image that should be white or grey, choose Skin if you are picking an area skin. The Skin Red and Skin Yellow sliders will appear.


The following options are available:

Amount

Set to 1 by default.

The slider is limited to values between 0 and 2 but you can type values between 0 and 5 by clicking on the current value in the inspector.

Gamma Boost

Set to 0 by default.

The slider is limited to values between 0 and 1 but you can type values between 0 and 2 by clicking on the current value in the inspector.

Brightens the midtones of the white balanced image.

Skin Red

Set to 0.5 by default.

The slider is limited to values between 0 and 1 but you can type values between -1 and 1 by clicking on the current value in the inspector.

Adjust how red the resulting skin color is.

Skin Yellow

Set to 0.1 by default.

The slider is limited to values between 0 and 0.5 but you can type values between -1 and 1 by clicking on the current value in the inspector.

Adjust how yellow the resulting skin color is.

COLOR

Hawaiki Keyer gives you an entire color correction suite so you can polish your composite all from within the one plug-in.


Enable

Off by default.

Exposure

Set to 0 by default.

The slider is limited to values between -5 and 5 but you can type values between -16 and 16 by clicking on the current value in the inspector.

New in HK5

Temperature

Set to 0 by default.

The slider is limited to values between -100 and 100 but you can type values between -120 and 120 by clicking on the current value in the inspector.

New in HK5

Tint

Set to 0 by default.

The slider is limited to values between -100 and 100 but you can type values between -200 and 200 by clicking on the current value in the inspector.

New in HK5

Hue

Angle set to by default.

Value must be between and .

New in HK5

Color Space

Set the Color Space of all of all Color parameters below this menu.

NB. Exposure, Temperature, Tint and Hue operations are always performed in the default linear color space of the plug-in.

New in HK5

The following options are available:

Tone Curve

Set the Tone Curve (transfer function) of all Color parameters below this menu.

New in HK5

The following options are available:

Input Gamma

Set to 1.96 by default.

The slider is limited to values between 0 and 3 but you can type values between 0 and 100 by clicking on the current value in the inspector.

Apple HLG

Off by default.

Uses the HLG encoding adopted by Apple’s HLG color spaces.

CONTRAST

Set to 0 by default.

The slider is limited to values between -1 and 1 but you can type values between -1 and 10 by clicking on the current value in the inspector.

New in HK5

Pivot

Set to 0.5 by default.

The slider is limited to values between 0 and 1 but you can type values between -1 and 100 by clicking on the current value in the inspector.

PRE-SATURATION

Set to 1 by default.

The slider is limited to values between 0 and 2 but you can type values between 0 and 10 by clicking on the current value in the inspector.

L

Set to 1 by default.

The slider is limited to values between 0 and 2 but you can type values between 0 and 10 by clicking on the current value in the inspector.

M

Set to 1 by default.

The slider is limited to values between 0 and 2 but you can type values between 0 and 10 by clicking on the current value in the inspector.

H

Set to 1 by default.

The slider is limited to values between 0 and 2 but you can type values between 0 and 10 by clicking on the current value in the inspector.

OFFSET

Set to 0 by default.

The slider is limited to values between -1 and 1 but you can type values between -100 and 100 by clicking on the current value in the inspector.

R

Set to 0 by default.

The slider is limited to values between -1 and 1 but you can type values between -100 and 100 by clicking on the current value in the inspector.

G

Set to 0 by default.

The slider is limited to values between -1 and 1 but you can type values between -100 and 100 by clicking on the current value in the inspector.

B

Set to 0 by default.

The slider is limited to values between -1 and 1 but you can type values between -100 and 100 by clicking on the current value in the inspector.

LIFT

Set to 0 by default.

The slider is limited to values between -1 and 1 but you can type values between -2 and 2 by clicking on the current value in the inspector.

R

Set to 0 by default.

The slider is limited to values between -1 and 1 but you can type values between -2 and 2 by clicking on the current value in the inspector.

G

Set to 0 by default.

The slider is limited to values between -1 and 1 but you can type values between -2 and 2 by clicking on the current value in the inspector.

B

Set to 0 by default.

The slider is limited to values between -1 and 1 but you can type values between -2 and 2 by clicking on the current value in the inspector.

Lift Pivot

Set to 1 by default.

The slider is limited to values between 1 and 10 but you can type values between 0.1 and 100 by clicking on the current value in the inspector.

Set the pivot point for the lift sliders. Values above this are left unchanged.

New in HK5

GAMMA

Set to 1 by default.

The slider is limited to values between 0 and 2 but you can type values between 0 and 100 by clicking on the current value in the inspector.

R

Set to 1 by default.

The slider is limited to values between 0 and 2 but you can type values between 0 and 100 by clicking on the current value in the inspector.

G

Set to 1 by default.

The slider is limited to values between 0 and 2 but you can type values between 0 and 100 by clicking on the current value in the inspector.

B

Set to 1 by default.

The slider is limited to values between 0 and 2 but you can type values between 0 and 100 by clicking on the current value in the inspector.

GAIN

Set to 1 by default.

The slider is limited to values between 0 and 2 but you can type values between 0 and 100 by clicking on the current value in the inspector.

R

Set to 1 by default.

The slider is limited to values between 0 and 2 but you can type values between 0 and 100 by clicking on the current value in the inspector.

G

Set to 1 by default.

The slider is limited to values between 0 and 2 but you can type values between 0 and 100 by clicking on the current value in the inspector.

B

Set to 1 by default.

The slider is limited to values between 0 and 2 but you can type values between 0 and 100 by clicking on the current value in the inspector.

SATURATION

Set to 1 by default.

The slider is limited to values between 0 and 2 but you can type values between 0 and 10 by clicking on the current value in the inspector.

New in HK5

L

Set to 1 by default.

The slider is limited to values between 0 and 2 but you can type values between 0 and 10 by clicking on the current value in the inspector.

M

Set to 1 by default.

The slider is limited to values between 0 and 2 but you can type values between 0 and 10 by clicking on the current value in the inspector.

H

Set to 1 by default.

The slider is limited to values between 0 and 2 but you can type values between 0 and 10 by clicking on the current value in the inspector.

Mix

Set to 100% by default.

Control the overall effect of the parameters in the Color group.

New in HK5

EDGE TOOLS

The Edge Tools group provides a range of custom tools for refining your edges.

Hawaiki Keyer Tutorial: Edge Tools

Edge Matte

Adjust the Width and Density sliders to taste - it's a very good idea to do this while looking at the Edge Matte view so you know exactly what you are doing. Normally the default edge width and density should be enough, but you may need to increase the values for problematic foregrounds or high resolution footage. Note that the Edge Matte view is not the matte used in Light Wrap.


Width

Set to 5 by default.

The slider is limited to values between 0 and 10 but you can type values between 0 and 100 by clicking on the current value in the inspector.

Density

Set to 2 by default.

The slider is limited to values between 0 and 5 but you can type values between 0 and 10 by clicking on the current value in the inspector.

Qualify

Off by default.

If you enable Qualify, you will see the Center, Angle and Spread controls appear and the Edge Matte view change with purple on the left hand side and yellow on the right, representing the two halves of a gradient matte. This is used in Edge Replace and Edge where additional controls will become visible.

When you enable Qualify, you will see the Edge Matte view change with purple on the left hand side and yellow on the right, representing the two halves of the gradient. The Value A sliders will now control the areas that are purple and the Value B slider sthe edges that are yellow.

You can adjust the Angle of the gradient any way you like - so for example you could have Value A at the top and Value B at the bottom by entering an Angle of -90 degrees. You can adjust the center of the gradient with the Center slider - negative values move the center closer to Value A and vice versa. Finally, the Spread slider allows you to adjust the spread of values across the gradient and hence the softness of the mix between the A and B values - a lower Spread value will make for a more abrupt transition between the two sides and a larger value will spread it out further.


Center

Set to 0 by default. Only values between -1 and 1 are allowed.

Angle

Set to by default.

Value must be between and .

Spread

Set to 1 by default.

The slider is limited to values between 0 and 2 but you can type values between 0 and 4 by clicking on the current value in the inspector.

EDGE REPLACE

Off by default.

Edge Replace

Edge Replace allows you to replace the edge of the foreground with pixels further from the edge. Useful for dealing with a noticeable dark or light edge caused by excessive in-camera sharpening and chroma subsampling as well as the real world light wrap that is present in some shots.

It does this by eroding - Sample In - then blurring - Fill - the foreground and replacing the original foreground with these synthesized pixels in the area defined by the main Edge Matte. Amount controls the blend of the replacement with the original - a value of 1 replaces the original foreground entirely (providing the Edge Matte value is also 1).

NB. You can refine the area affected by Edge Replace with the Edge Matte controls.

You need to increase Sample In enough to avoid sampling the edge artefacts (by default Sample In is set to zero because the Fill process suffices for a lot of shots) and then push Fill just enough to ensure the edge pixels are replaced. The ideal setting for these controls is very much dependent on the color of the surrounding foreground pixels as well as the color of the background in the area you are replacing.


Fill

Set to 3 by default.

The slider is limited to values between 1 and 30 but you can type values between 1 and 100 by clicking on the current value in the inspector.

Sample In

Set to 0 by default.

The slider is limited to values between 0 and 20 but you can type values between 0 and 50 by clicking on the current value in the inspector.

Amount

Set to 1 by default.

The slider is limited to values between 0 and 1 but you can type values between 0 and 0 by clicking on the current value in the inspector.

— B —

When The Edge Matte is qualified you have the option to qualify Edge Replace with a gradient matte and the B controls appear. The A sliders will now control the areas that are purple and the B sliders the edges that are yellow. This allows you to target specific problem areas.


Fill

Set to 3 by default.

The slider is limited to values between 1 and 30 but you can type values between 1 and 100 by clicking on the current value in the inspector.

Displayed when Edge Matte - Qualify is enabled. Works on areas of the Edge Matte that are coloured yellow.

Sample In

Set to 0 by default.

The slider is limited to values between 0 and 20 but you can type values between 0 and 50 by clicking on the current value in the inspector.

Displayed when Edge Matte - Qualify is enabled. Works on areas of the Edge Matte that are coloured yellow.

Amount

Set to 1 by default.

The slider is limited to values between 0 and 1 but you can type values between 0 and 0 by clicking on the current value in the inspector.

Displayed when Edge Matte - Qualify is enabled. Works on areas of the Edge Matte that are coloured yellow.

EDGE

Off by default.

Edge

You can adjust the color (RGB Balance, Brightness and Saturation), transparency and blur of the edge. Note that unless Qualify is enabled, the A sliders are the master controls for the various edge corrections and the B sliders are not shown.

Each of these methods uses the same very thin matte which only encompasses the very edges of your foreground. Using this matte you can make detailed adjustments to the edge as required to help the foreground sit better into the background, compensate for edges that have been over-lit, or create special effects. The really powerful and unique feature of Edge in Hawaiki Keyer 5 is that you can divide the edge in two and affect either side independently, using the Qualify option.

New in HK5


Brightness

Set to 0 by default.

The slider is limited to values between -0.5 and 0.5 but you can type values between -1 and 1 by clicking on the current value in the inspector.

Use the Brightness slider to adjust the brightness of the edge up or down as required.

Saturation

Set to 1 by default.

The slider is limited to values between 0 and 2 but you can type values between 0 and 3 by clicking on the current value in the inspector.

Adjusts the saturation of the edge as required.

R

Set to 0 by default.

The slider is limited to values between -0.5 and 0.5 but you can type values between -1 and 1 by clicking on the current value in the inspector.

Adjust the red channel of the Edge.

G

Set to 0 by default.

The slider is limited to values between -0.5 and 0.5 but you can type values between -1 and 1 by clicking on the current value in the inspector.

Adjust the green channel of the Edge.

B

Set to 0 by default.

The slider is limited to values between -0.5 and 0.5 but you can type values between -1 and 1 by clicking on the current value in the inspector.

Adjust the blue channel of the edge.

Transparency

Set to 1 by default. Only values between 0 and 1 are allowed.

Edge Transparency is a great way to soften any hard edges in your matte and give you a smoother-looking composite. It uses the same thin edge matte as the rest of the edge features and allows you to reduce the opacity of the foreground in that small area.

Blur

Set to 0 by default.

The slider is limited to values between 0 and 10 but you can type values between 0 and 100 by clicking on the current value in the inspector.

Set the blur radius with the Blur sliders. Edge Blur has a more subtle effect than the main Matte Blur.

In general, you want to avoid blurring your matte wherever you can to preserve as much fine detail as possible, but sometimes if your green/blue screen is not as good as it should be, you'll have unwanted "stepping" or aliasing of your edges, or some of the processing you have applied may have made them look a bit too sharp. If this is the case, your first step should be to make sure you have enabled Denoise (see above) which is specifically designed to deal with this type of issue and will handle it really beautifully and smoothly without compromising your matte. If your footage is really poor and Denoise doesn't get you far enough only then should you consider using Blur - after having first fired your cameraman and/or thrown away your camera!

If you are encountering serious aliasing problems, it usually means that you've over-processed the matte somewhere or other. Make sure you go back and review your previous decisions to see if you can improve on them before trying Blur. Hawaiki Keyer gives you more options for refining your matte than any other keyer so you should usually be able to find a good way of treating the problem without having to resort to blur.

NB. Changes to Edge transparency and blur change the matte and as such will be reflected in the Matte view

— B —

When The Edge Matte is qualified you have the option to qualify Edge Replace with a gradient matte and the B controls appear. The A sliders will now control the areas that are purple and the B sliders the edges that are yellow. This allows you to target specific problem areas.


Brightness

Set to 0 by default.

The slider is limited to values between -0.5 and 0.5 but you can type values between -1 and 1 by clicking on the current value in the inspector.

Use the Brightness slider to adjust the brightness of the edge up or down as required.

Displayed when Edge Matte - Qualify is enabled. Works on areas of the Edge Matte that are coloured yellow.

Saturation

Set to 1 by default.

The slider is limited to values between 0 and 2 but you can type values between 0 and 3 by clicking on the current value in the inspector.

Adjusts the saturation of the edge as required.

Displayed when Edge Matte - Qualify is enabled. Works on areas of the Edge Matte that are coloured yellow.

R

Set to 0 by default.

The slider is limited to values between -0.5 and 0.5 but you can type values between -1 and 1 by clicking on the current value in the inspector.

Adjust the red channel of the Edge.

Displayed when Edge Matte - Qualify is enabled. Works on areas of the Edge Matte that are coloured yellow.

G

Set to 0 by default.

The slider is limited to values between -0.5 and 0.5 but you can type values between -1 and 1 by clicking on the current value in the inspector.

Adjust the green channel of the Edge.

Displayed when Edge Matte - Qualify is enabled. Works on areas of the Edge Matte that are coloured yellow.

B

Set to 0 by default.

The slider is limited to values between -0.5 and 0.5 but you can type values between -1 and 1 by clicking on the current value in the inspector.

Adjust the blue channel of the edge.

Displayed when Edge Matte - Qualify is enabled. Works on areas of the Edge Matte that are coloured yellow.

Transparency

Set to 1 by default. Only values between 0 and 1 are allowed.

Edge Transparency is a great way to soften any hard edges in your matte and give you a smoother-looking composite. It uses the same thin edge matte as the rest of the edge features and allows you to reduce the opacity of the foreground in that small area.

Displayed when Edge Matte - Qualify is enabled. Works on areas of the Edge Matte that are coloured yellow.

Blur

Set to 0 by default.

The slider is limited to values between 0 and 10 but you can type values between 0 and 100 by clicking on the current value in the inspector.

Set the blur radius with the Blur sliders. Edge Blur has a more subtle effect than the main Matte Blur.

Displayed when Edge Matte - Qualify is enabled. Works on areas of the Edge Matte that are coloured yellow.

Tone Curve Gamma

Set to 1.96 by default.

The slider is limited to values between 1 and 3 but you can type values between 0.01 and 5 by clicking on the current value in the inspector.

Edge Brightness and RGB can now work in a gamma space which you can set with the Tone Curve Gamma slider - defaults to the Final Cut Pro default of 1.96. Colour adjustments are more fine grained especially when when the foreground is dark. Set to 1.0 to revert to the current behaviour in HK 4.5 Edge Tools.

New in HK5

FINE EDGE

Off by default.

Fine Edge

Fine Edge allows you to darken the outer edge and brighten the inner edge of the foreground’s semi-transparent (grey matte values) pixels. Quite sophisticated results can be achieve with a look that differs from the main Edge brightness.


NB.Use BG requires the Background dropzone to be populated as it uses the luminance of the background image to adjust the process.

New in HK5

Brighten Inner

Set to 1 by default.

The slider is limited to values between 1 and 2 but you can type values between 1 and 5 by clicking on the current value in the inspector.

Darken Outer

Set to 0 by default. Only values between -1 and 0 are allowed.

Use BG

Off by default.

Amount

Set to 0.5 by default.

The slider is limited to values between 0 and 1 but you can type values between 0 and 2 by clicking on the current value in the inspector.

BACKGROUND MATCH

Off by default.

Background Match

Background Match automatically adjusts the edges of the foreground to match the color and brightness of the background. If a foreground pixel is darker than the background it will be brightened and if lighter than the background, darkened but only in the area defined by the Edge Matte. Background Match can be used as an alternative or complement to Light Wrap.


IMPORTANT NOTE: - It's important to note that in order to use this feature, you need to add your background image to the Background source well. Without a background image being fed to the plug-in, you won't get the desired result.

Color Amount

Set to 1 by default. Only values between 0 and 1 are allowed.

Brightness Amount

Set to 1 by default. Only values between 0 and 1 are allowed.

Saturation

Set to 1 by default.

The slider is limited to values between 0 and 2 but you can type values between 0 and 3 by clicking on the current value in the inspector.

Clamp

On by default.

Amount

Set to 0.5 by default.

The slider is limited to values between 0 and 2 but you can type values between 0 and 3 by clicking on the current value in the inspector.

LIGHT WRAP

Off by default.

Light Wrap

Light Wrap simulates the indirect illumination of the scene, which is where the background colors wrap themselves around the edges of the foreground. This can be very useful in helping the match between the keyed foreground and the new background.

Toggle the Light Wrap switch to enable this feature, and adjust the amount, depth (the distance that the Light Wrap overlaps the foreground), the brightness and the saturation.

Select from five different blend modes for light wrap: Screen, Add, Overlay, Soft Light, and Multiply.

Just remember that a little of this effect goes a long way, so it's best not to overdo it - gauge the amount you need depending on the illumination level of the new background.


Blend Mode

The following options are available:

Amount

Set to 0.25 by default. Only values between 0 and 1 are allowed.

Depth

Set to 3 by default.

The slider is limited to values between 1 and 10 but you can type values between 1 and 20 by clicking on the current value in the inspector.

The distance that the Light Wrap overlaps the foreground.

Brightness

Set to 0 by default.

The slider is limited to values between -0.5 and 0.5 but you can type values between -0.5 and 1 by clicking on the current value in the inspector.

Saturation

Set to 1.5 by default.

The slider is limited to values between 0 and 3 but you can type values between 0 and 5 by clicking on the current value in the inspector.

Luma Match

Set to 0 by default.

The slider is limited to values between 0 and 1 but you can type values between 0 and 0 by clicking on the current value in the inspector.

Allows you to match the original luma of the foreground but mix in the color from the background. This control can also be used to subtly reduce Light Wrap brightness.

Background Blur

Set to 3 by default.

The slider is limited to values between 0 and 5 but you can type values between 0 and 100 by clicking on the current value in the inspector.

Control the amount the background is blurred when creating the light wrap.

EDGE BLEND

Off by default.

Edge Blend

Edge Blend is a really sophisticated compositing technique used by visual effects artists to put the finishing touches to a great composite. It works by taking another very thin matte that encompasses the composited foreground and background, and then creates a subtle blend of foreground and background just in that small area. It's a great way of making your keys look more photorealistic and less artificial.

In general, the only control you will need to adjust for Edge Blend is the Amount slider, which determines the intensity of the effect. The Blend slider adjusts the blend of foreground and background, but in almost all cases you will find that the default value of 3.0 is the right blend amount for your needs. However, you might need to increase this value when using source footage that is 4K and upwards.


IMPORTANT NOTE: - It's important to note that in order to use this feature, you need to add your background image to the Background source well. Without a background image being fed to the plug-in, you won't get the desired result.

New in HK5

Blend

Set to 3 by default.

The slider is limited to values between 1 and 10 but you can type values between 1 and 20 by clicking on the current value in the inspector.

Amount

Set to 2 by default.

The slider is limited to values between 0 and 4 but you can type values between 0 and 10 by clicking on the current value in the inspector.

PREMULTIPLY

Off by default.

Premultiply

Combines the background and foreground where the matte is transparent.


IMPORTANT NOTE: - It's important to note that in order to use this feature, you need to add your background image to the Background source well. Without a background image being fed to the plug-in, you won't get the desired result.

New in HK5

Additive

Set to 0 by default.

The slider is limited to values between 0 and 1 but you can type values between 0 and 0 by clicking on the current value in the inspector.

When the Additive slider is set to 1 you are combining the background with the unpremultiplied foreground. When set to 0 it is the standard source over blend mode. In practice increasing additive raises the brightness of the edge of the foreground.

Amount

Set to 1 by default. Only values between 0 and 1 are allowed.

Use Color

Off by default.

Changes the background image used in Light Wrap, Background Match, Despill - Use Background, Fine Edge - Use BG, Edge Blend and Premultiply from the background image well to the color selected in the On Color swatch.

On Color

Set to
black by default.

Pick the color used by the On Color view and when Use Color is enabled.


Background

Lets you provide additional media to the effect.

The user interface varies by host:

Drop Zones in Final Cut Pro
Drop Zones in Motion
Video Track Menu in Premiere Pro
Layer Menu in After Effects

BACKGROUND

Set the background image used in Edge Tools and Despill - Use Background.


Fit Background

Off by default.

Resize the background image to match the foreground. Check the new Background view to see the results.


Fitting Method

The following options are available:

Scaling

Choose the scaling algorithm used to resize the background image.

The following options are available:

Centered

On by default.

Pixel Aligned

On by default.

External Matte

Lets you provide additional media to the effect.

The user interface varies by host:

Drop Zones in Final Cut Pro
Drop Zones in Motion
Video Track Menu in Premiere Pro
Layer Menu in After Effects

EXTERNAL MATTE

HK5 gives you the ablity to bring in an external matte for use by the keyer.


IMPORTANT NOTE: For External Matte to function correctly, it's really important that your external image is formatted correctly - if for any reason it's not the exact same size and aspect ratio as your timeline, please make sure to create a compound clip of it (Final Cut Pro), put it in a flattened group (Motion), nest it (Premiere), or precompose it (After Effects). The plug-in is expecting to see an image that is the same aspect ratio as your timeline - the host application has no way of telling the plug-in that you have used something different. If you have applied any kind of spatial transform (position, crop, scale or rotate) to your external matte, the same thing applies and you will need to preformat it in the same way. And the same thing applies if you have applied a spatial transform to the shot that you are trying to key. In each case, preformatting will give you the correct result, while failure to do this will mean that the images are out of register with each other.

Mode

Use the dropdown menu to select how the External Matte is combined with the matte generated by the keyer.

There are many uses for this option, but an obvious use for Add (or Max) is to create a hold-out matte, and for Multiply (or Min) to create a garbage matte. Replace is useful if you simply want to use the spill suppression and other finishing options of Hawaiki Keyer but the matte from another instance of Hawaiki Keyer or another keyer.

The following options are available:

Channel

Pick the channel of the external matte to use as a matte: Red, Green, Blue or Alpha.

NB. HK4 always used Red and expected a black and white matte.

New in HK5

The following options are available:

Clamp

Off by default.

Enable clamping of output values.

New in HK5


Output Min

Set to 0 by default.

The slider is limited to values between 0 and 1 but you can type values between -10 and 10 by clicking on the current value in the inspector.

Set the minimum output value.

Output Max

Set to 1 by default.

The slider is limited to values between 0 and 10 but you can type values between 0 and 1000 by clicking on the current value in the inspector.

Set the maximum output value.

Resolution Independence

On by default.

RESOLUTION INDEPENDENCE

Maintain consistent effects when changing resolution.

The baseline parameter can be used to set the relative strength of the parameters - increasing will decrease the strength. Or you can set it to match the behaviour you are used to in Hawaiki Keyer 4 - simply match the Baseline to the resolution of your footage. Lastly, if Resolution Independence is not enabled and you then copy and paste an instance of the keyer to a clip with a different resolution - enable Resolution Independence on the new clip and set the baseline to the width of the first clip - this will ensure the parameter strength matches.


Resolution Independent Parameters :

  • Denoise: Strength
  • Matte: Shrink - Grow
  • Matte: Blur
  • Matte Cleaner: Fill Holes
  • Outer Matte: Expand
  • Despill - Use Background: Depth
  • Edge Matte: Width
  • Edge Replace: Sample In
  • Edge Replace: Fill
  • Light Wrap: Background Blur
  • Light Wrap: Depth
  • Edge Blend: Blend
New in HK5

Baseline

The following options are available:

Width

Set to 3840 by default.

The slider is limited to values between 1 and 8192 but you can type values between 1 and 16384 by clicking on the current value in the inspector.

Manually set the Resolution Independence Baseline.

Presets

Presets contain a snapshot of your effect configuration. While no built-in presets are available, you can still save and load your own preset files.

When you save parameter configuration to a file on disk, this file can later be loaded to recreate the same effect configuration. Presets generated in one video application can be used by the same plug-in running in a different video application.

How do I use the presets popup menu?

The built-in presets allow you to save any of your keys for future use, or you can customise a default layout of the plug-in.