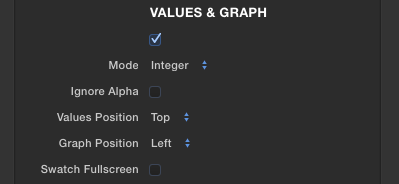
Basic Operation - You can find Hawaiki Analyzer in your Titles Browser in FCP, in your Filters library in Motion, and in the Effects library in Premiere and After Effects. Analyzer is designed to be used as an adjustment layer in all of these host applications - apart from Motion where it can be applied directly to any layer or group as required.
In FCP drag the Analyzer to the top of your footage in the timeline and it will analyze everything it sees beneath it. Extend the clip for as long or as short as you need it. There is no need to add more than one instance of the plug-in to any timeline, since you can simply move the clip to wherever it is needed. Simply delete or mute it when you have finished with it.
In Premiere and After Effects, add an adjustment layer to your project or composition and add the Analyzer plug-in to that layer. It will analyze everything below it. Delete or mute the adjustment layer when you no longer need access to the plug-in.
Also included in the plug-in is Hawaiki Histogram which provides an onscreen histogram tool for analysing either the entire frame or a selected area for really precise and detailed color evaluation. A separate manual for this module is available.
Important Note - Because the Analyzer is a graphical overlay it will be embedded in your project when you render or export unless you take care to delete or mute it.
New in Analyzer 1.0.3 - support for M1 (Apple silicon) Macs.
System Requirements
macOS: Mojave 10.14.6, Catalina, Big Sur
FxFactory: 7.2.5 +
Apps: Final Cut Pro 10.4 +, Motion 5.4 +, Premiere Pro 12 +, After Effects 15 +
M1 (Apple silicon) Macs: require Final Cut Pro 10.5.3 +
SAMPLING
Regular scopes give you feedback about the entire frame but with Analyzer you can be very specific about the area you are targeting which makes for far greater precision and ease of use.
Analyzer allows you to sample either a single pixel, a grid of pixels, an area of the frame, or the entire frame. Use the Mode dropdown menu to select the preferred option.
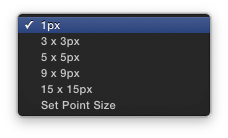
Point - samples a single pixel or a grid of pixels (centred on the white Point onscreen control) depending on the your choice in the Point Size menu immediately below it. In the Point Size menu you can choose from 1px, 3x3px, 5x5px, 9x9px, 15x15px, or the Set Point Size option, which brings up a slider that allows you to select the point size you prefer.
(NB. while the slider maximum is 400 a value up to 4000 pixels can be entered.)
A yellow outline guide or crosshair will show around the Point onscreen control in the viewer to indicate the size of the selected grid. You can turn this guide off with the Guide checkbox.
Area - Allows you to set a rectangular area to sample. When enabled the black Area onscreen control is activated and a yellow guide outlines the area selected. The two onscreen controls can be moved in any direction to define an area to sample.
NB. At the bottom of the Inspector, there are position controls for both the Point and Area OSCs, which can be used to reset the positions to their defaults.
In Final Cut Pro and Motion holding down the option key while clicking either control will also reset their positions; holding command while moving the mouse will slow the speed of the pointer, allowing for more precise selection; and holding the shift key will constrain that movement to either the x or y axis depending on the initial movement.
Frame - Analyzer samples the entire frame.
Value - Select the sampled value that Analyzer displays - you can choose to return the Average, Minimum or Maximum RGB values of the sampled area. (NB. when the sample is a single pixel this menu will have no effect.)
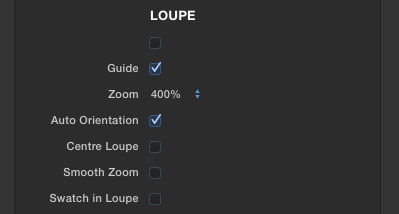
Guide - Turns the crosshair and area guide on and off. (NB. there is a separate control for the guide that appears inside the loupe.)
The built-in presets allow you to save your preferred display setup. They also allow you to return to a sample using a single instance of Analyzer.
Place a timeline or clip marker at the sample time and save the Analyzer setup with a descriptive name. Later, if you you wish to recall the sample return to the marker and call up the preset.